Engine Bay Restoration: A Beginner's Journey

This area is for members who are restoring their Lincolns or any other project that they wish to discuss and document with fellow forum members. You can link to your own off-site page or post all your pics and progress in the thread itself. Customizers should use the Customizer Members' Projects forum.
Locked
scottandstephanie
Frequent Contributor
Posts: 153
Joined: Fri Sep 29, 2006 6:48 am
Location: Dearborn, MI
Contact:

Engine Bay Restoration: A Beginner's Journey

Post by scottandstephanie »

It's official. I've been talked into pulling the motor (and just about everything else) out of the engine bay on our 1966 Cont Convertible We've had a wonderful summer of cruising and club events, but I'm tired of the leaks, noises and the black dark hole that is our engine bay.

After several conversations with Dan S and our fearless leader Doug, I am now embarking on what will be the most challenging project of my life. Egged on by club members, Dan's slideshow, and everyone else's engine bay that has inspired me, I am ready to transform myself from owner to restorer. Why? Because I need to do this myself. I need the experience, I need the satisfaction of doing the job with my own hands, and most of all, the car needs it. I can no longer afford to send this thing to the mechanic when it burps.

What will make this interesting for everyone (I hope) is that I'VE NEVER EVER EVER WORKED ON A CAR IN MY LIFE! That's right folks, I'm going in with almost no mechanical experience. I've changed tires and air filters.......and that's about it. Pretty scary, huh?

I hope the point that I end up making-for myself most of all-is that a person can do anything they put their mind to. I feel very positive about this, and I think I'm getting this off to a good start by involving all of you.

Why now? Well, because I have a spot booked with the body shop that I don't want to lose, and I've come to realize that doing more major mechanical work on a freshly painted car is, well........ass backwards. It was some club friends that came up with the ideal solution; get the engine bay clear, send the car out for body and paint. While the car is there, work on all the engine bay parts (clean, clear, and refinish) and put it all back together.

Sound like a plan? Are you with me? Well good, because I'm pretty excited about sharing this experience with you. Maybe it'll inspire someone else to get an old Lincoln back on the road.

The best part is, you all get to help! Get ready for lots of questions.

Let's do a quick inventory:

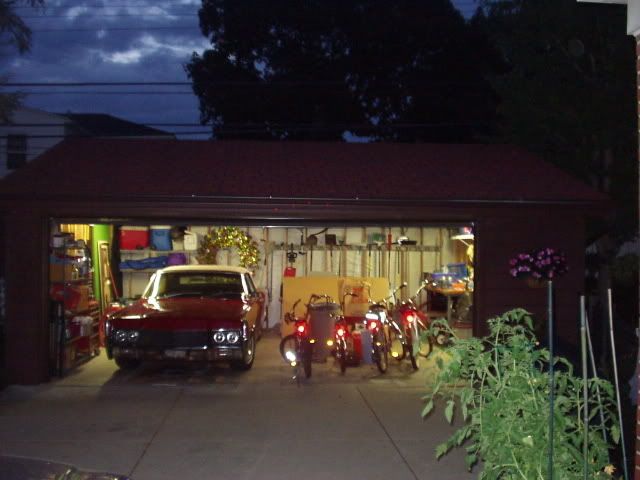
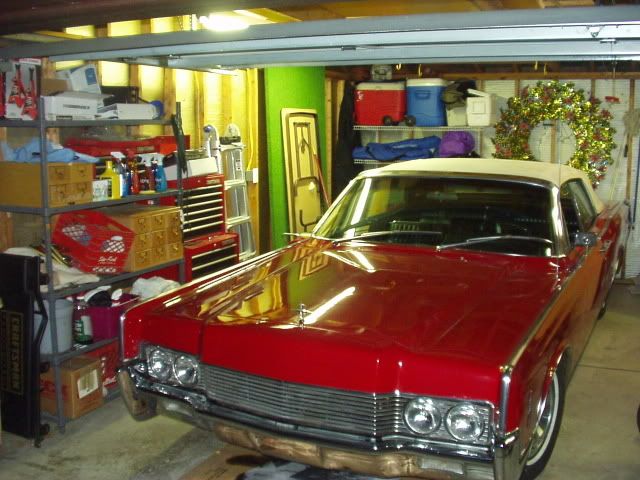
-I have a great workspace. I had new lighting put up in the 2.5 car detached garage that'll be home to this project, along with upgraded electrical service and a couple of 220V outlets
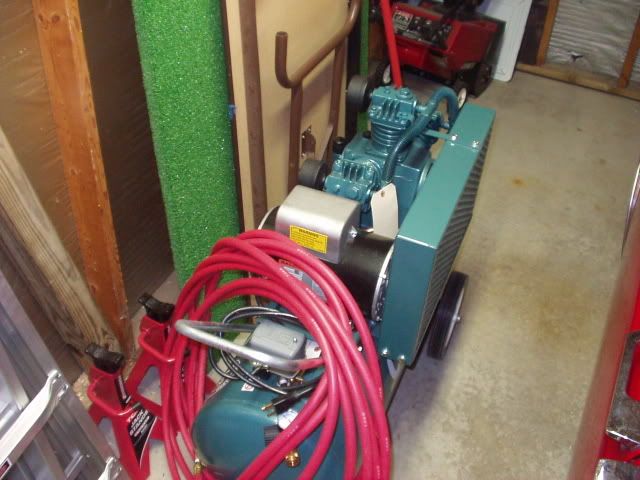
-I invested in an awesome air compressor, and bought a very slightly used electrical oven for powder coating
-I have pretty good collection of tools
-I live 20 minutes away from Dan The Man
-I have several other friends that would love to come over and watch me take this motor apart. I won't count on them being too close by when its time to put it back together ;-)
-I have time. My goal is to have everything out of the bay by Halloween, with all of November for prepping the metal for paint
-Most of all, I have a wonderful wife that supports me in this project. I love you Steph! :smt008

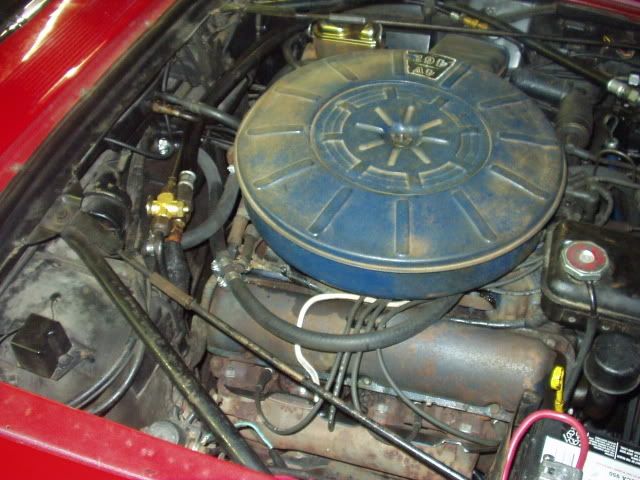
Ok ,enough of that. Here's what'll happen next. On Friday, Sept 28th I am driving the car in a Homecoming parade. The project starts Saturday morning. Before then I'll load the first set of pics, which will be of the work area and the car.

First question:

Since the car will be out of commission all thru this project, will me and the paint guy be able to manually move the deck lid and top assembly? I plan on opening the trunk enough to clear the deck unlock screws. Do I have to disconnect the hydraulic lines?

Stay tuned everyone! Wish me luck!

Scott
User avatar
toddallen
TLFer for Life
Posts: 10640
Joined: Tue Apr 27, 2004 1:01 am
Location: Salem, OR
Contact:

Re: Engine Bay Restoration: A Beginner's Journey

Post by toddallen »

Go for it ! :grin:

We will be watching you.

On the deck lid, and top, leave the lines attached they will make a mess. Just disconnect the pins that attach the cylinder shafts to the mechanics- no mess no fuss, and yes, you can lift them by yourself or with help.

If you are going to strip out the electrical, you want the convertible header panel unlocked, since it may be a pain to get to manually.
1963 Linc Convertible
1963 Linc Vert parts car
1968 Mustang FB
2009 Cadillac CTS
User avatar
Bob Hubbard
On Special Assignment
Posts: 3095
Joined: Fri Jan 09, 2004 1:01 am
Location: Los Angeles

Re: Engine Bay Restoration: A Beginner's Journey

Post by Bob Hubbard »

Scott, let me start by saying it will be a daunting task, but once finished, you have the satisfaction of knowing you did it yourself.
I started mine a while back on my 59, and because of other work commitments, I only managed to remove the engine, transmission, and every wire and part from the entire engine bay.
I cleaned 48 years of crud from the suspension, sanded it, and hopefully by spring, the engine bay and complete undercarraige will be finished.
After that, my next project is to tackle the seals and gaskets in the engine and transmission.
With the engine out, this is the best time to do everything I can to the engine.
What got me started on this enging bay and engine resealing was a post on this forum a long time ago.
The dude posting had a fire in his mark III due to leaking valve cover gaskets.
That got me to thinking that I should check mine.
When I saw they were leaking, I decided then to remove the engine and clean it,and replace all seals and gaskets.
Once the engine was out, I decided putting a nice clean engine back in that dirty engine bay would be just plain stupid.
So, out came the trans, and then the idea to re -paint the suspension and copmplete undercarraige seemed like the thing to do.
You too will be caught up in this "snow ball effect"
One thing I would strongly advise you to do, and that is, take tons and tons of digital pictures beforer disassembling anything.
Pay particular attention to where wires go, and how, and to what they are attached.
Label everything you remove, as soon as it is removed, weather it is clean or full of greese.
What I used for labels was the sticky back pieces that you would use on an office file so you know what's in the file.(availaable at any office supply)
Put all bolts and washers in a bag. labeled what they go too.
Don't for one minute think, "I can remember where that went".
This is one of those instances where a picture is worth a thousand words.
Most of all, TAKE YOUR TIME.
Get a service manual for your car.
You can't do without it.
Doing over my engine bay, suspension and undercarraige to this pont has been a big task, but, like me, you will learn, nothing worthwhile comes easy.
Our rainy season in Southern California is just around the cornor so, I don't think I will get much more done before spring.
Good luck with the project, and post pictures of your progress.
Bob.
User avatar
briven95
Dedicated Enthusiast
Posts: 856
Joined: Fri Feb 20, 2004 1:01 am
Location: Farmington Hills, MI
Contact:

Re: Engine Bay Restoration: A Beginner's Journey

Post by briven95 »

Scott, best of luck in your project!! And don't be discouraged when things end up taking a whole lot more time than you may realize. We await the pictures! :D
scottandstephanie
Frequent Contributor
Posts: 153
Joined: Fri Sep 29, 2006 6:48 am
Location: Dearborn, MI
Contact:

Re: Engine Bay Restoration: A Beginner's Journey

Post by scottandstephanie »

Thanks for the kick-off words of encouragement everyone!

Todd-when you suggest leaving the header "unlocked", you mean have the hooks retracted, correct? I will probably leave the top in the trunk for the flatbed tow to the body guy.

Bob, thanks for the tips. I am getting what I call the "cataloging" materials together which'll include lots of assorted zip lock baggies, cardstock labels with wire twist ties, paper labels, sharpies, etc. I have an old digital camera that I don't care if it gets greasy. My plan is to photograph the disassembly in quadrants moving from front to rear, top to bottom. I'll try to have each section on a separate disc.

Bags/labels will have the description and date of removal. Fasteners will stay with the part/bracket whenever possible. I have two old library card drawer boxes to keep the small stuff. Milk crates and plastic totes for the medium stuff, and some shelving and banquet tables for big pieces.

I'm acquiring a reconditioned sandblast cabinet also. Supposed to be done later this week. Lots of activity to get prepared. Last night, just to sweep the garage floor required an hour of moving our junk around. I have to get a radio in the garage also. Already have fridge and propane heater.

My cousin is a transmission mechanic, so when that comes out it'll go to him.

Brian, I have been thinking, planing, researching, etc all summer since seeing Dan's car. In my mind I have an idea of how long it'll take but I know that I should triple that estimate! Your words of advice will be well heeded!

I'll get the "shop" and car pics put together later tonight. Also going to get some supplies soon. Need to contact my friend that owns an engine crane (he's restoring a 1972 Buick Skylark and uses it to move the body around on cribbing). Engine stand rental will cost about $90 per month so I'll be putting out the feelers on that also.

Ok, stay tuned!
User avatar
Bob Hubbard
On Special Assignment
Posts: 3095
Joined: Fri Jan 09, 2004 1:01 am
Location: Los Angeles

Re: Engine Bay Restoration: A Beginner's Journey

Post by Bob Hubbard »

Scott, When Istarted myproject, I bought an engine crane and stand because I knew it was going to take a while, and renting one woud not have been cost effective.
The crane worked great, but the engine stand was a disaster.
Once the engine was bolted to it, a day later, I noticed the enging "dropping" in the front.
The bolts were no where strong enough to hold all that weight, and the bracket configuration was not what I would call conducent to a big 430 engine.
I built my own engine stand from 4x4 lumber, and it works great..
Presently the engine and transmission are in my storage shed for the winter, and will begin on them in the spring.
I would suggest buying an engine crane, and when finished with it, sell it.
Bob.
User avatar
Barry Wolk
TLFer for Life
Posts: 10877
Joined: Sun Nov 24, 2002 1:01 am
Location: Farmington Hills, Michigan
Contact:

Re: Engine Bay Restoration: A Beginner's Journey

Post by Barry Wolk »

Bob Hubbard wrote: I would suggest buying an engine crane, and when finished with it, sell it.
Bob.

Why buy it when he can borrow mine? I would advise buying your own engine stand, though. It'll be on there for awhile.
'56 Mark II convertible, '51 Royal Spartanette, '56 Chris Craft Continental
'68 Lincoln Continental Limo, '77 Town Car, '55 356 Porsche Continental cabrio,
'69 Mark III convertible,'88 BMW 750iL, '88 BMW 325iX, '97 BMW Z-3, '98 ML-320

My newest car is 15 years old!
User avatar
Dan Szwarc
Site Admin
Posts: 29840
Joined: Fri Jun 16, 2000 1:01 am
Contact:

Re: Engine Bay Restoration: A Beginner's Journey

Post by Dan Szwarc »

barry2952 wrote:
Bob Hubbard wrote: I would suggest buying an engine crane, and when finished with it, sell it.
Bob.
Why buy it when he can borrow mine? I would advise buying your own engine stand, though. It'll be on there for awhile.
Borrow what you can. Make sure you have patient friends. Anything you buy, you can eBay or Craigslist later, so it's not a big deal.
scottandstephanie
Frequent Contributor
Posts: 153
Joined: Fri Sep 29, 2006 6:48 am
Location: Dearborn, MI
Contact:

Re: Engine Bay Restoration: A Beginner's Journey

Post by scottandstephanie »

I looked at stands today at Harbor Freight. Something about the $109.95 makes me nervous. Anyone have brand suggestions?
Thanks Barry, I'll take you up on your crane offer if my friend in Livonia flakes out. I figure I'm about a month or more away from lift out.

I got some cardboard bins for parts storage and a quilted blanket for cowl protection. My college friends would say "all preparation and NO H!

Going out to the garage tonight for more cleaning/putting junk away/organizing. Will have first pics tonight, with a special deluxe feature-the soaking wet cardboard that lived under the car this summer
scottandstephanie
Frequent Contributor
Posts: 153
Joined: Fri Sep 29, 2006 6:48 am
Location: Dearborn, MI
Contact:

Re: Engine Bay Restoration: A Beginner's Journey

Post by scottandstephanie »

Here are the first pics (very boring). I have another evening's worth of garage prep before Saturday:

This is an overview of our garage

Image

The car will be in the middle of the garage for this project. All the misc crap will be pushed into one area

Image

The Curtis Toledo 5hp/12.3 compressor. Good stuff. It seems like it fills instantly!

Image

This is why I'm doing this. Soaking wet motor pukes out about 1/4 oz of fluid after every trip.

Image

Dirty, wet motor

Image

More engine shots. This is actually photo practice

Image
Image
Image

Ok, tomorrow I'll buy some air tools. Sears is having a sale, but Harbor Freight might be a good place for wire wheels, sanding discs, grinding wheels, etc.

Dan, you mentioned a kit similar to a tap and die set that cleans and straightens bolt hole threads? And special eye bolts that were cast versus shaped?

Catch y'all later :smt006
User avatar
Barry Wolk
TLFer for Life
Posts: 10877
Joined: Sun Nov 24, 2002 1:01 am
Location: Farmington Hills, Michigan
Contact:

Re: Engine Bay Restoration: A Beginner's Journey

Post by Barry Wolk »

Metro Bolt in Redford, right behind my shop, has cast lifting rings. They also have individual taps and dies there. You might want to look at their 3M pads for your air grinder. They also have a handy tool called a thread file. Each file has 8 pitches that match common bolt threads.

If you're taking over the whole garage I would turn the car sideways at the rear of the garage. The area in front of the car, the way it's configured now, is going to get mighty cold this winter. Turning it sideways also gives you some room to work in front of the car. Did you say what you were using for heat? I just noticed that you have no insulation. That could prove costly. I think you might want to install insulation like Dan did in his new garage.

You could turn it sideways with a floor jack with a bunch of grunting, or, you could borrow the giant wheel skates I bought for the trailer, turn it sideways, set it back on the ground and bring me back the skates.

Another advantage to turning it sideways is that you gain about a foot of ceiling height when the garage door is up. Better for general lighting, too. I have some used light fixtures you could use for massive work lights. You can never have too much light.

Spend some money on overkill jack stands. Get or make some good wheel chocks. Remember, once you disconnect the driveshaft, having it in park won't matter.

Get into the habit of wearing heavy duty latex gloves all the time. I wish I had gotten in the habit. You are about to embark on some very dirty work. If you're leaking that badly you might want to have the bottom of the car steam cleaned before you even begin. It will get rid of a ton of grit that could mess you up later.

One last helpful hint. I learned a trade trick from a mechanic. When loosening a bolt, turn it in the opposite direction a little bit first. By tightening it you are breaking the bond of corrosion on the other end of the nut, allowing it to spin out with far less chance of breaking off the bolt.

I encourage you to make this attempt. I did my first motor rebuild at 15 and learned everything the hard way. Being a member here will make your life easier, guaranteed.
'56 Mark II convertible, '51 Royal Spartanette, '56 Chris Craft Continental
'68 Lincoln Continental Limo, '77 Town Car, '55 356 Porsche Continental cabrio,
'69 Mark III convertible,'88 BMW 750iL, '88 BMW 325iX, '97 BMW Z-3, '98 ML-320

My newest car is 15 years old!
User avatar
Dan Szwarc
Site Admin
Posts: 29840
Joined: Fri Jun 16, 2000 1:01 am
Contact:

Re: Engine Bay Restoration: A Beginner's Journey

Post by Dan Szwarc »

You can get the cast lifting rings at Home Depot, too. Their hours are better than Metro Bolt that which closes at 5pm.

Picture practice is good. You will hate having a pic out of focus.
stephenjha
Lincoln Maniac
Posts: 406
Joined: Thu Jul 14, 2005 11:41 pm
Location: Des Moines, Iowa
Contact:

Re: Engine Bay Restoration: A Beginner's Journey

Post by stephenjha »

The cardboard boxes on the garage floor looks just like my garage floor. :lol: 8) I want to do this same project with my car this winter.
64 LCC- Fiesta Red
64 LC - currently parting out
User avatar
briven95
Dedicated Enthusiast
Posts: 856
Joined: Fri Feb 20, 2004 1:01 am
Location: Farmington Hills, MI
Contact:

Re: Engine Bay Restoration: A Beginner's Journey

Post by briven95 »

Barry's suggestions about turning the car sideways and getting the bottom steam-cleaned first are excellent ideas. Also, when taking pictures, use the highest resolution so that you can zoom in for close-ups of areas when needed and not have it fuzz out just when you need to see where that bolt is supposed to go! :wink:
Locked

Who is online

Users browsing this forum: No registered users and 1 guest