1966 Lincoln Getting Bags

This forum is for those members who wish to post continuously updated threads on their Lincoln that is being customized beyond stock. Members who are restoring their cars to original, should use the regular Members' Projects forum.

Moderators: Dan Szwarc, jleonard

Post Reply
User avatar
darrylqmiller
Lincoln Maniac
Posts: 496
Joined: Tue Apr 05, 2011 12:58 am
Location: Peachtree City, Georgia
Contact:

1966 Lincoln Getting Bags

Post by darrylqmiller »

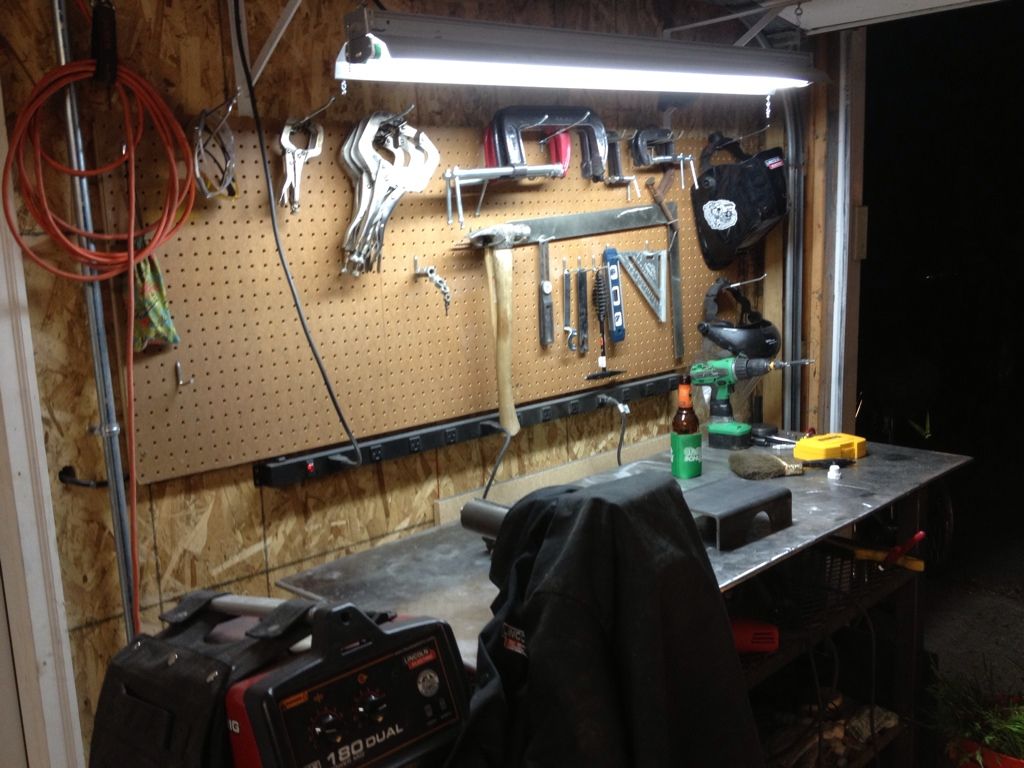
Among many things I am using a Thor Brothers 4 Link, EDC, Slam Specialties RE-7's, AVS 9 Switch box and digital gauges. So far I'm in it about $3800 but have just about everything I need. This price also includes the $1400 I spent at Ox Arc buying a brand new Lincoln 180 dual (110/220) mig and accessories. A Mobsteel kit would have been WAY EASIER but I want to see if I can do it plus it's a good excuse for a new welder since I left mine in California with a buddy when I moved 14 years ago.

Mainly just pictures for now as it takes way to long to do a post for everything and I got work to do. I'll go into details as the weekend ends. The job I'm on now is a nice 2 hour drive each way so that makes for nice 12-14 hour days and only weekends for wrenching so don't want to waste to much time typing on a Sunday morning.

*edit* Weekend is over so lets add some words to the pictures.
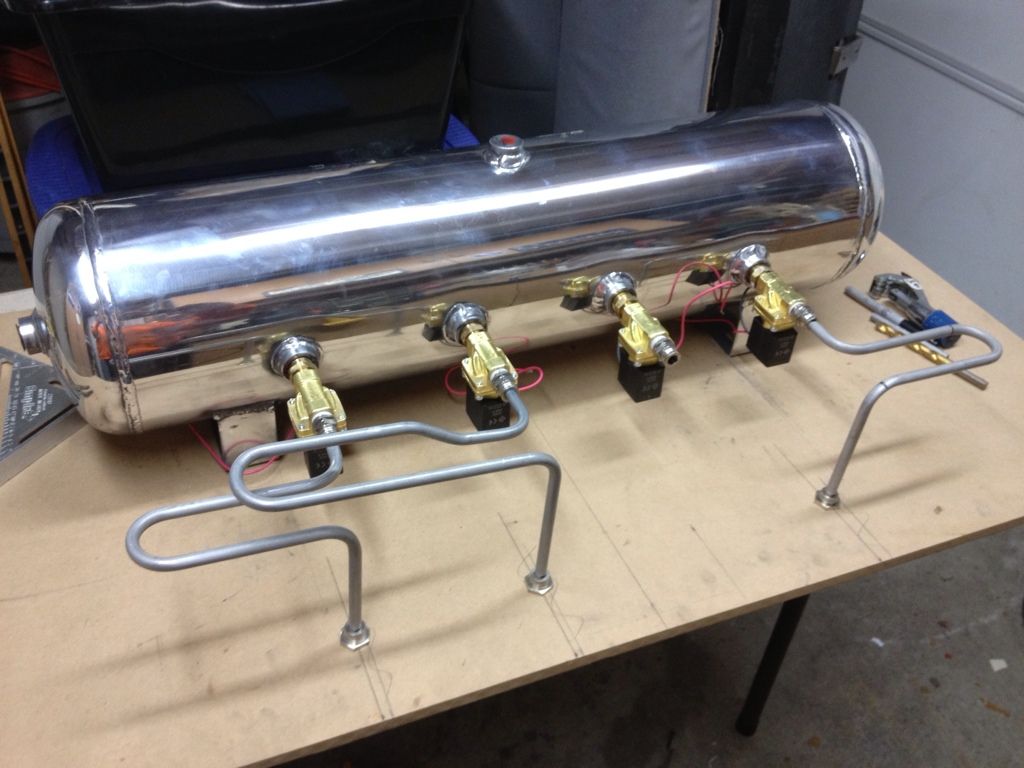
Looked at way too many hardline pictures so I tried my hand while waiting for bags and bars. Bought a Rigid 3/8 inch bender off of Ebay to use for bending lines. The thing worked great and after a few tries got pretty good at putting bends where they needed to be. Spend some time with the buffing wheel and sand paper after reading and watching tutorials on You Tube. Got the tank pretty close to done, just got a little bit more polishing but figured it was going to get a bit dirty during install so I'm save the last polishing for after I get everything set right where I want it.
Using 3/8 SMC valves I got from The Gauge Store, on sale for $200. My first purchase for this extravaganza. Mounting the four fills on the tank, the rear two dumps will be mounted under the tank close to the bags and the front two will be installed under the fender well covers (not sure of the proper name.) All four corners will have flow control valves to control descent along with check valves. That way if I loose a line between the tank and the bag the bags should stay inflated.
Image

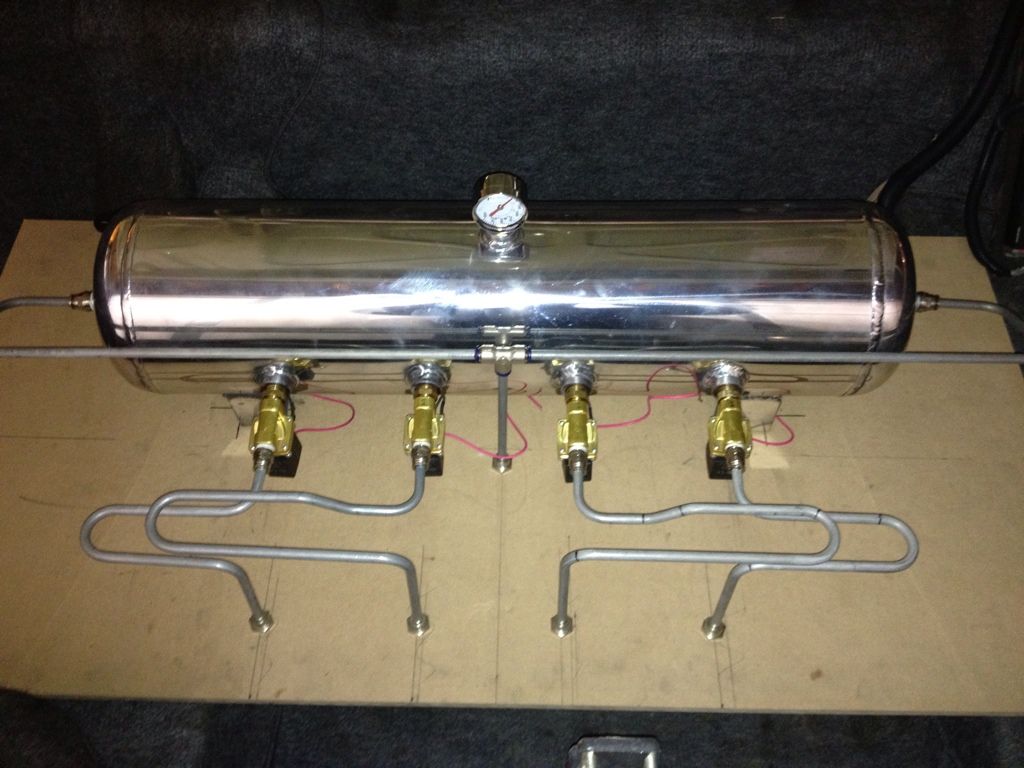
Once i got to this point I temporarily installed the check valves where the lines exit the tank and added a schrader valve where the EDC will fill at. I had to see if those push-to-connect (PTC) fittings really worked. Filled it up to 100 PSI like the plumbers at work do when they test systems. It held for two days without one leak, guess they do indeed work. Oh, Used Locktite 545 thread sealant on all the threads, bought this from seller iwillgetitforu on Ebay. The PTC fittings are ASCO units I bought from fx_custumz on Ebay.
Image

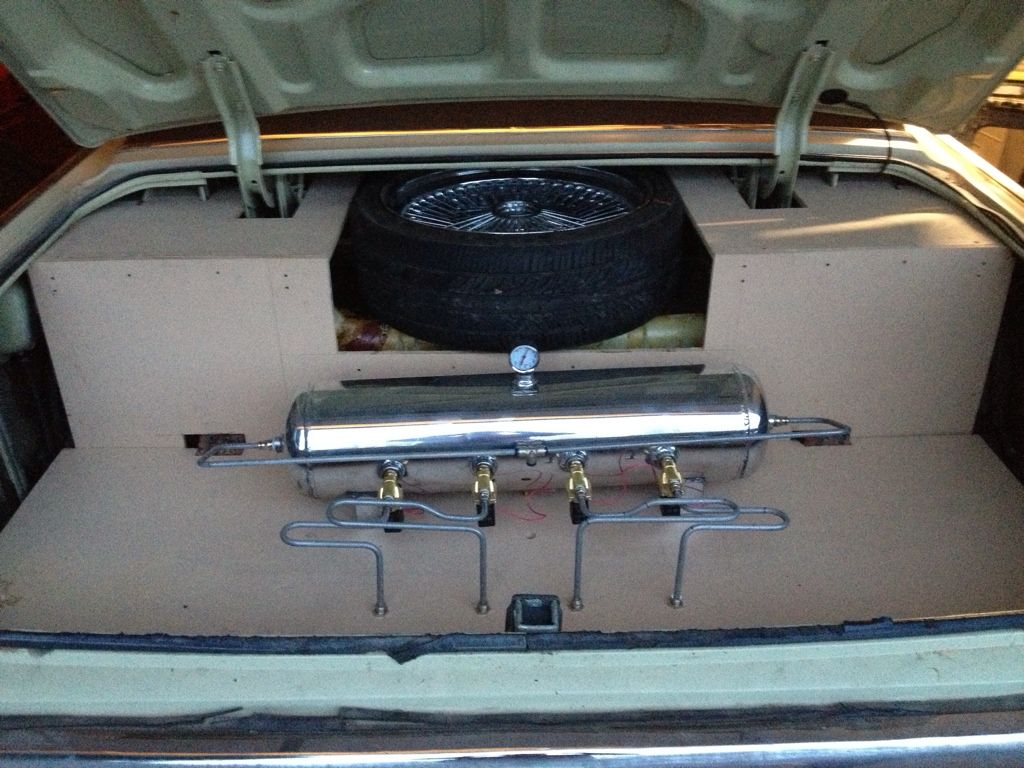
Here it is sitting in the trunk For some reason it looks crooked in both pictures but I checked and it's not
Image

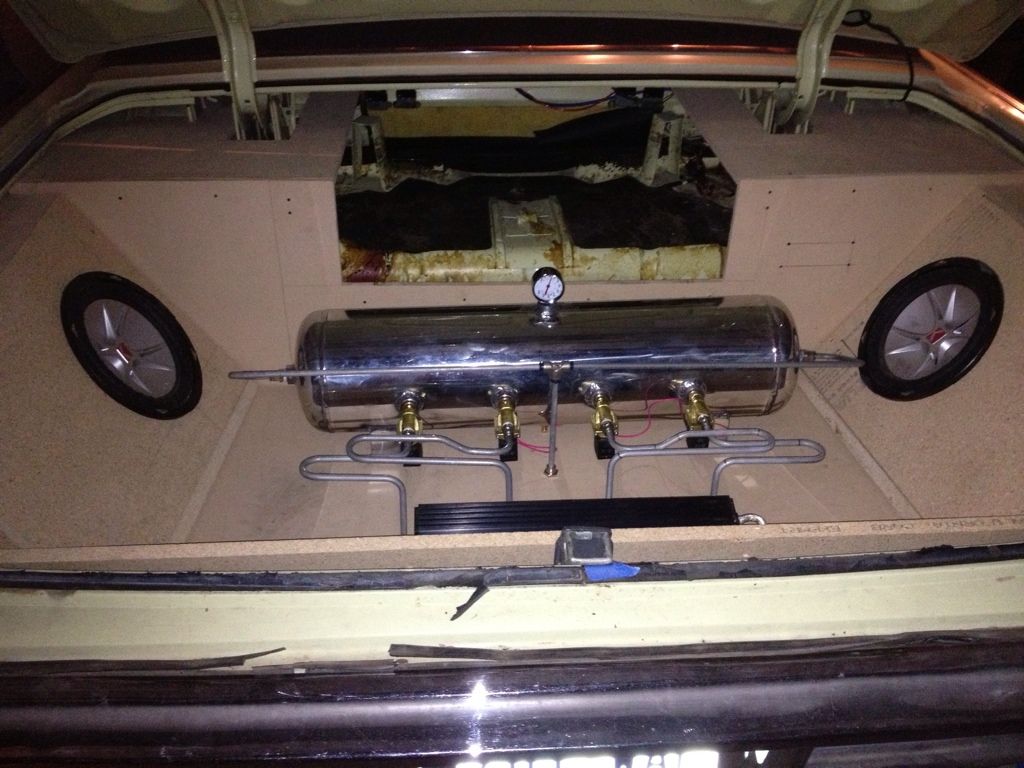
Getting the right size for the sub boxes was hard since I didn't just want square boxes. Not only are they triangular but they slope down from the front of the box (the side towards the back seat) to the end (the side were the trunk lock is) to meet the contour of the trunk lid. Not so sure I like where they are placed in the box now, in the middle would be more eye pleasing but not sure if they would fit there due to depth restrictions.
Image

At this time everything in the trunk is just placed there. It all needs to be cleaned up, dialed in, little filler pieces made, boxes need to disassembled and glued and everything needs to be screwed down.
Bars and bags showed up from Thor Brothers (Suicide Doors) so I stopped work on trunk set up so I could get to work on suspension.
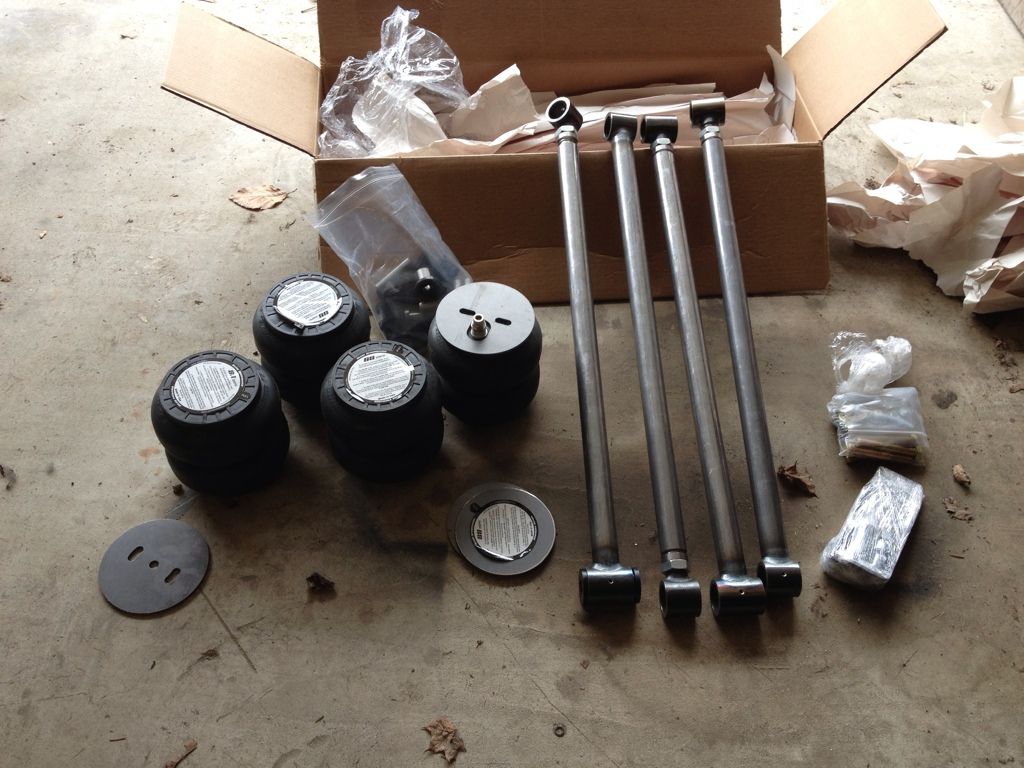
Image

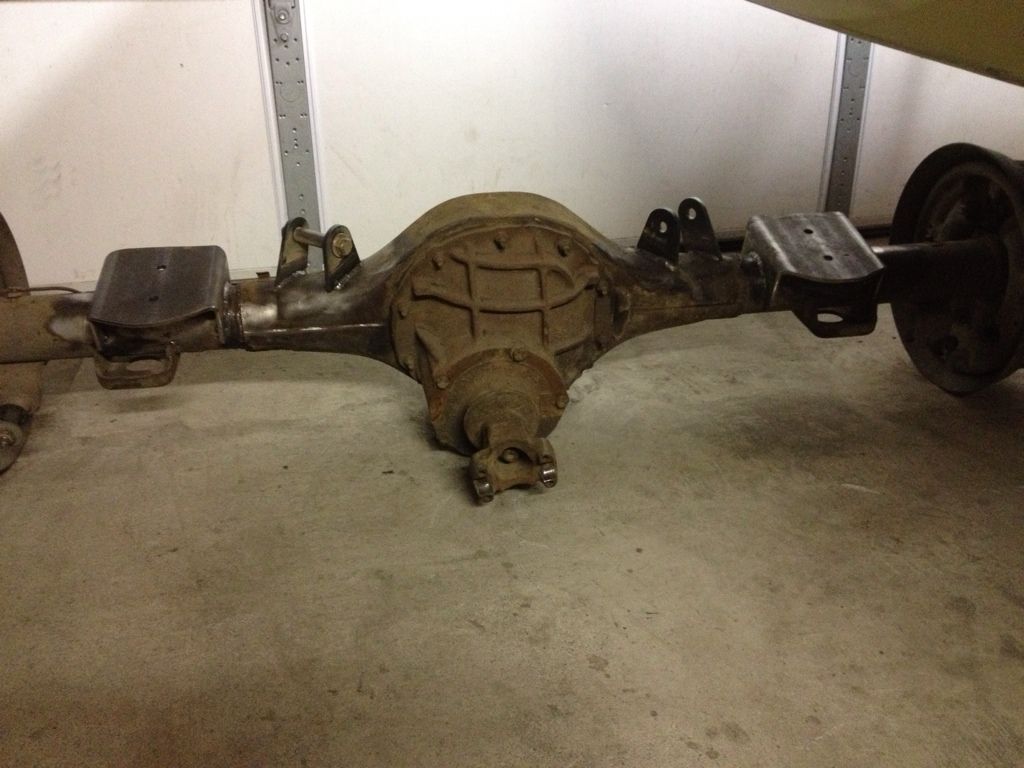
I made my own plates out of 1/4 inch steel to mount the lower bars in the stock leaf spring location. Bought new heavy duty 9/16 inch u-bolts, grade 8 washers and lock washers. After much measuring and re-measuring I bit the bullet and cut the bars to length and tacked the tabs to the plate.
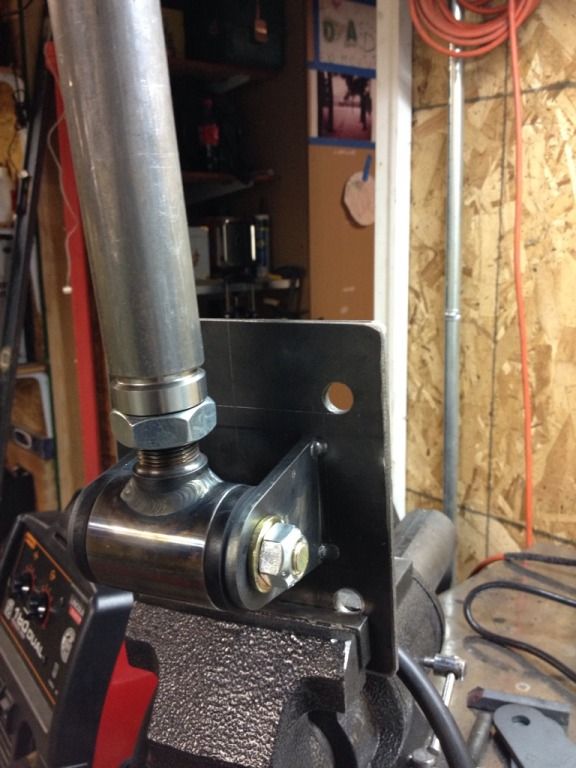
Image

Here it is mounted up without the Grade 8 stuff.
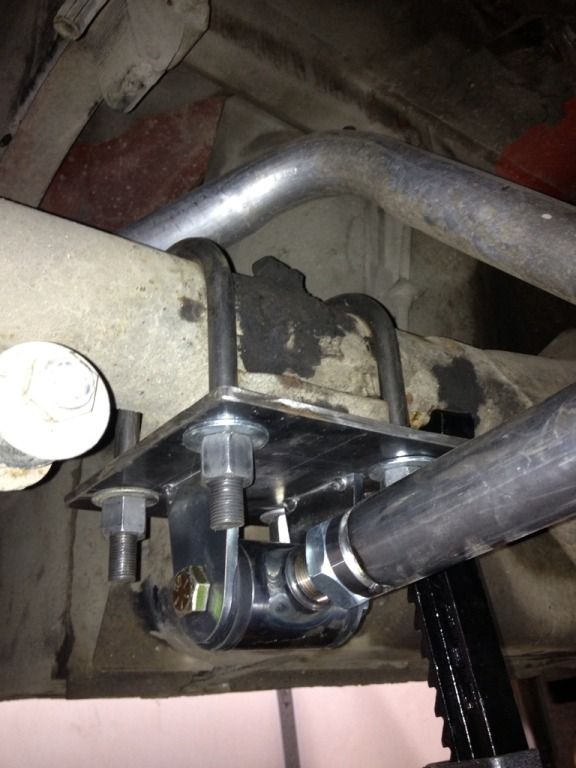
Image

At this point I made the other bar and went to mount it. Turns out the axle got shifted a bit, not enough to do any harm but enough to make me get tired of the half-assed way I was using jack stands and a bottle jack to keep the rear end in place. So off came the one bar and I got out a 4 X 4 sheet of 3/4 inch plywood I found at work. Used some heavy duty shelving brackets, 1 X 4's and 2 X 2's and made me a rear end carriage to hold that thing in place. I know, kinda red neck but I do live one exit from the Idaho border so cut a guy some slack! Got out the tape and plumb bob to get the rear end centered and squared and pinion angle set(again.)
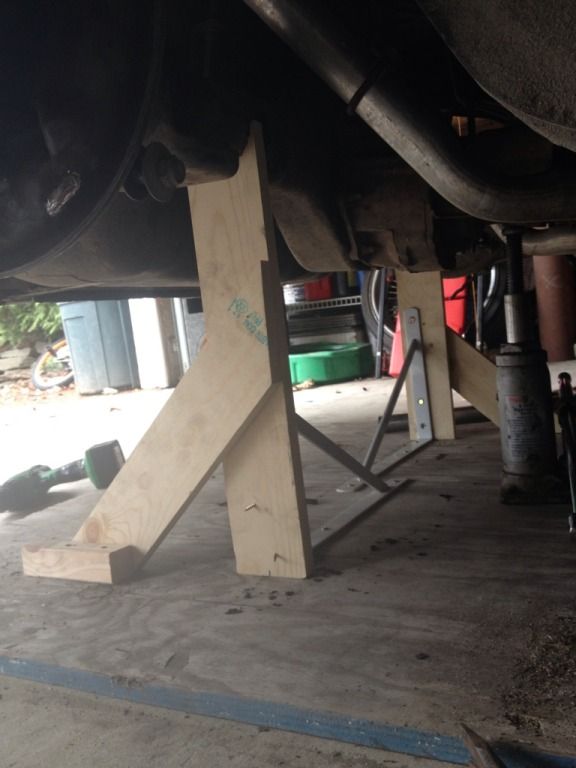
Image

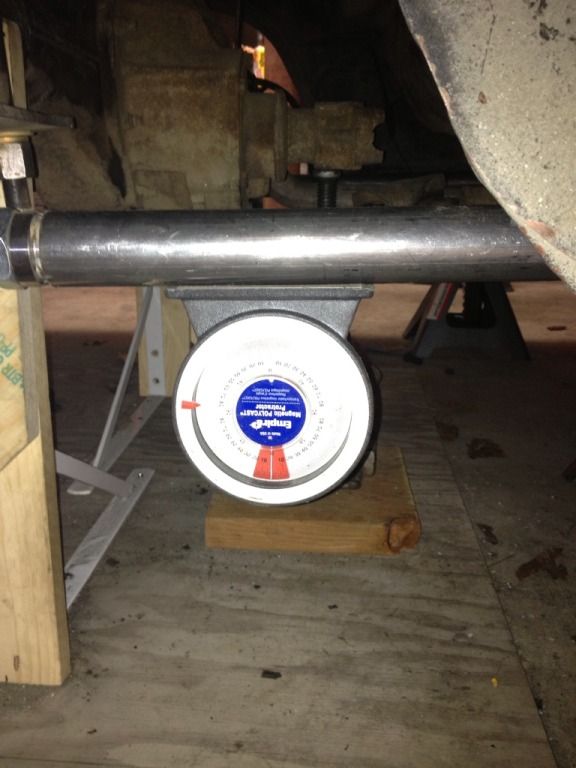
You can see here that at ride height with the pinion angle set I managed to get the rear bar fairly level to the ground. The next challenge is going to make the upper ones match while maintaining the correct length. Not knocking Mob Steel at all as I have no first hand knowledge of their product (I'm probably going to wish I just bought their kit by the time this is all said and done) but in the few pictures I've seen it doesn't seem like their upper bars are angled enough to locate the axle properly. I'm sure it's just the pictures but I'm thinking I got my work cut out for me trying to make room for the bags and the upper bars. Hope the exhaust fits after I'm done!
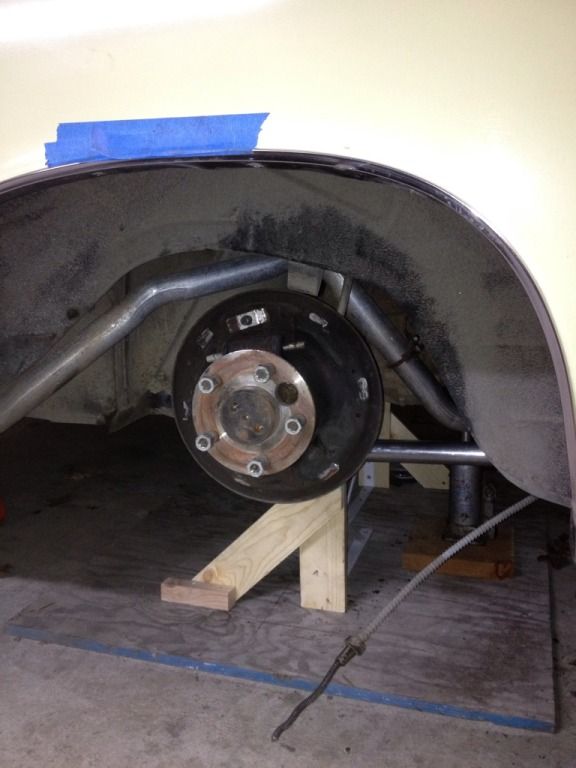
Image

Working on upper bars today. Next weekend is a big one for my wife as she's rolling out here leadership conference to a few thousand people so I'll be tied up there. So far you're looking at about a months worth of work. With my wife traveling, two kids and my work schedule I don't have much time to work on this but will do updates when I can.
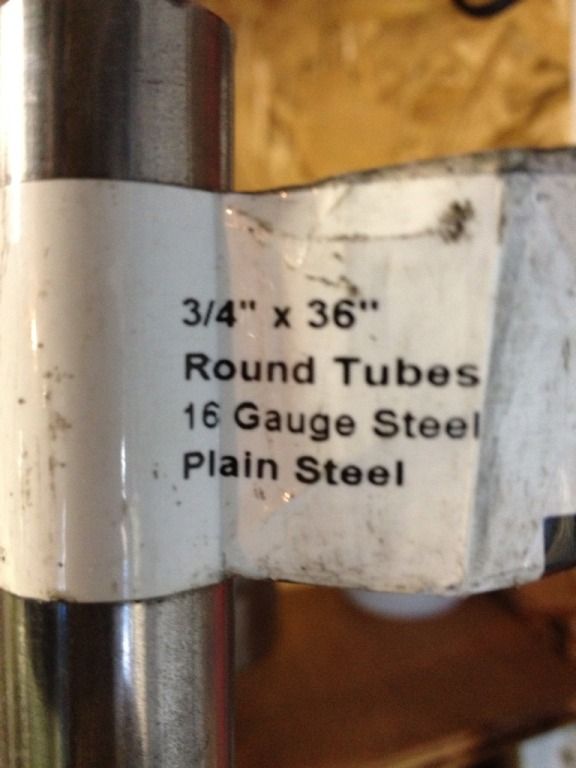
Last edited by darrylqmiller on Wed Apr 17, 2013 1:18 am, edited 5 times in total.
User avatar
darrylqmiller
Lincoln Maniac
Posts: 496
Joined: Tue Apr 05, 2011 12:58 am
Location: Peachtree City, Georgia
Contact:

Re: !966 Lincoln Getting Bags

Post by darrylqmiller »

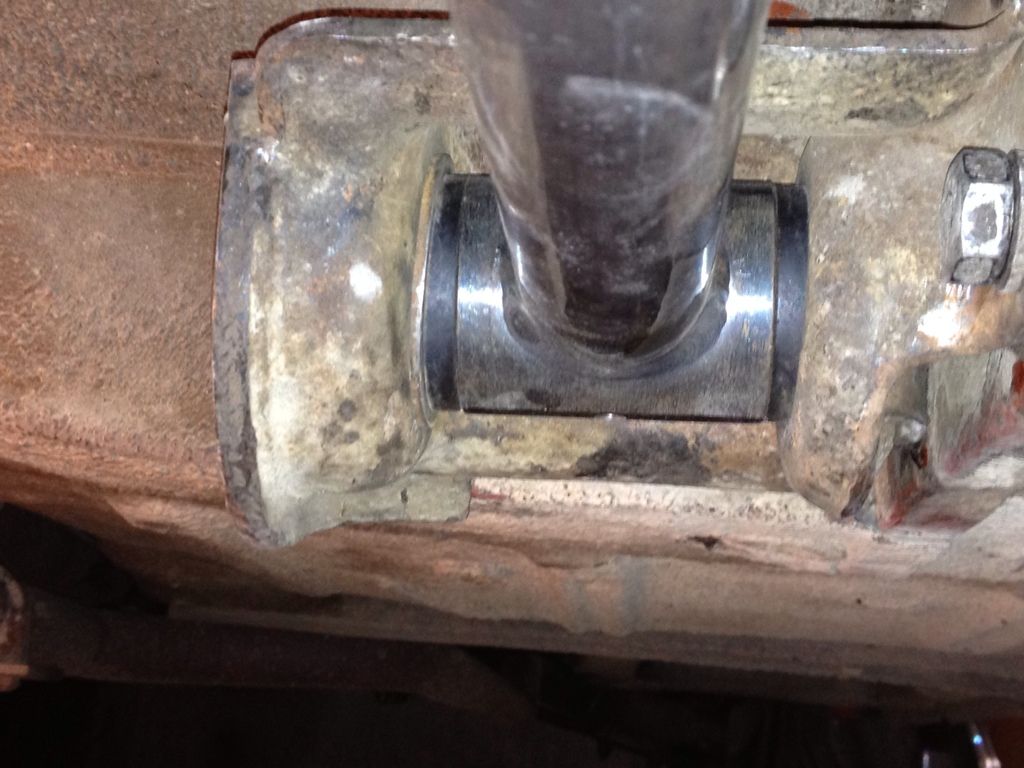
Okay so far no pictures of the front lower bar mount so here it is. I used the factory leaf spring mount. The rod ends from Thor Brothers fit perfect. Only problem was the front leaf spring bolt was to big of a diameter to fit inside the steel sleeve of the bushing that came with the 4 link kit. I tired to use the bolts and washers from the kit instead but I just couldn't get the bushing to sit right, I just wasn't happy with it. Well lucky me, I happened to be walking down the aisle of my local Ace getting PVC fittings (more on that later) when out of the corner of my eye I spotted a piece of tubing in the steel section.
Image
Looked about the right size so I ran back home and got my leaf spring bolt, a bushing and returned. Well hello Lady Luck, it fit the bushing perfect and the bolt slid in with just a bit of persuasion. And I don't mean 3 lb. sledge persuasion I mean file the burrs from where it was cut so it would fit persuasion. Cut two pieces to the same length as the ones that came with my four link kit, slid them in the bushing and installed the arm just like I would a new leaf spring bushing, perfect fit.

Image

Oh, there's that PVC in the background. Basically 1 1/2 inch PVC pipe and Tees are about the same size as my rod ends and tubing so I'm using that to mock up my upper bars. A lot easier on the pocket book to mess up $6.00 worth of plastic figuring out where everything is going to fit.

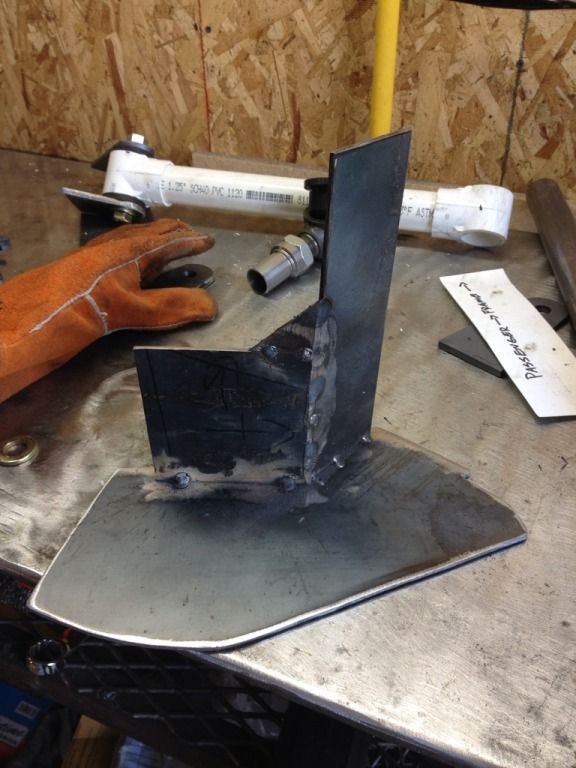
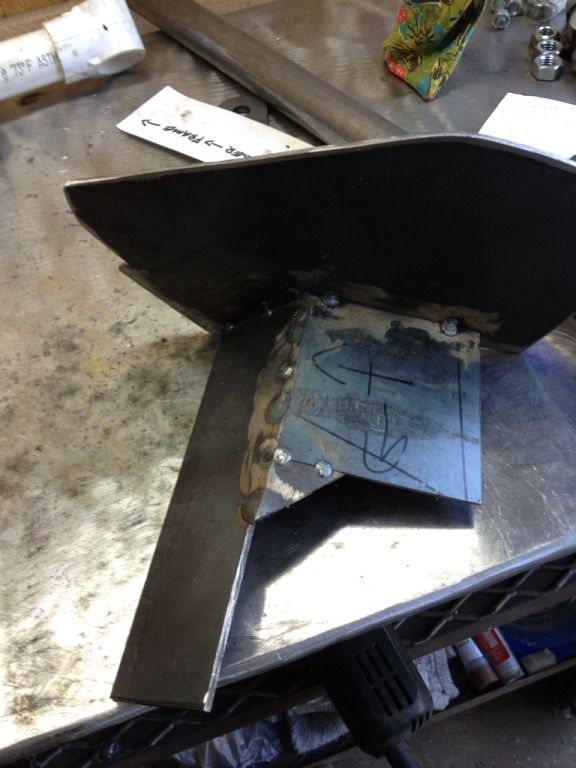
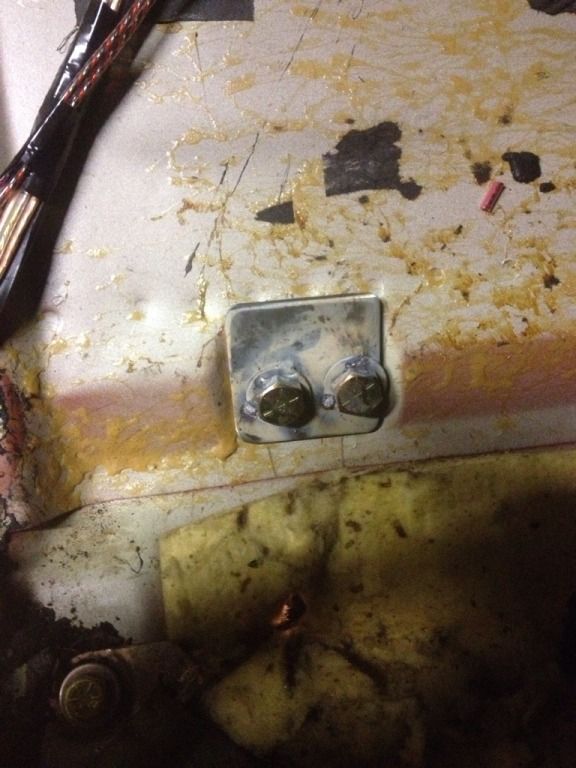
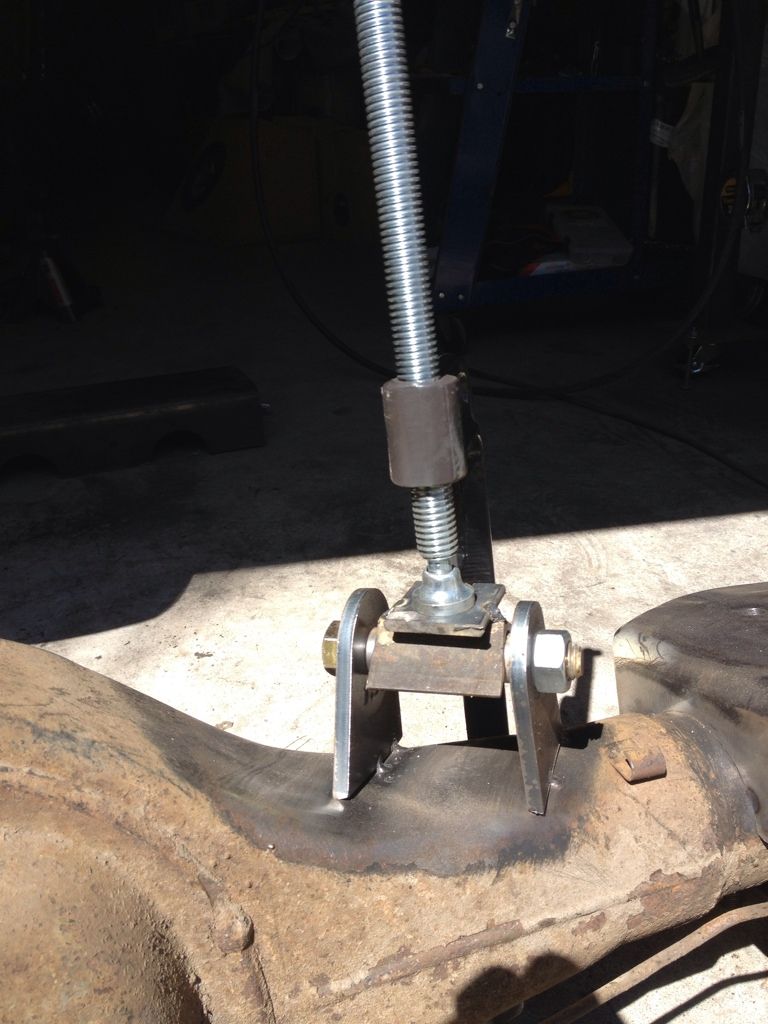
Sooo..here's my solution to the uni-body structure and my upper bar mount. It's a work in progress but basically it's going to mount to the "frame," one part will use the reinforced structure where the seat belt mount is to locate it and another two 1/2 inch grade 8 bolts with a backing plate will sandwich the body. Very similar to what I've seen in install directions from various manufacturers. Okay, okay, so I'm borrowing the idea from them but it is out on the web for anyone to view.
This is where I stopped tonight. Not in the picture but I drilled the two 1/2 inch holes and need to pick up a 7/16 bit to drill a hole for the seat belt locating bolt. I have dinner with a friend from out of town tomorrow night but I'll try to drill the last hole, put it on and take a picture. This is definitely a "picture is worth a 1000 words moment."
Image
Image
Last edited by darrylqmiller on Wed Apr 17, 2013 1:19 am, edited 1 time in total.
crispix396
Lincoln Maniac
Posts: 297
Joined: Tue Oct 25, 2011 2:41 am
Contact:

Re: !966 Lincoln Getting Bags

Post by crispix396 »

awesome, i like the PVC mockups.
Because I forget to post it...
1962 Lincoln continental convertible
1995 Caprice wagon
User avatar
sigsterrr
Frequent Contributor
Posts: 155
Joined: Sat Sep 15, 2012 6:31 am
Location: Wesley Chapel, Florida
Contact:

Re: 1966 Lincoln Getting Bags

Post by sigsterrr »

The pictures sure do help the rest of us.
Fixing something on an old Lincoln is like sex with a hot woman - one time will never get the job done right.

64 Continental Sedan Black/Black

And how I buy my parts - http://www.paintngoinc.com
User avatar
darrylqmiller
Lincoln Maniac
Posts: 496
Joined: Tue Apr 05, 2011 12:58 am
Location: Peachtree City, Georgia
Contact:

Re: 1966 Lincoln Getting Bags

Post by darrylqmiller »

Dinner went late and found out I have to get up at four to get ready for work. Tomorrow is Boy Scouts, hopefully I'll get the drill bit and have stuff ready so I can get this piece in Wednesday and take some pictures.
crispix396 wrote:awesome, i like the PVC mockups.
Yeah, I can't afford to waste the money OR time ordering new links if I screw up.
sigsterrr wrote:The pictures sure do help the rest of us.
Well I keep reminding myself to stop and take pictures as I go. i hope others can learn from my mistakes. I also have measurements written down so I add those when I get more done and make sure they work.
User avatar
darrylqmiller
Lincoln Maniac
Posts: 496
Joined: Tue Apr 05, 2011 12:58 am
Location: Peachtree City, Georgia
Contact:

Re: 1966 Lincoln Getting Bags

Post by darrylqmiller »

Okay, got my bolts and drill bit last night and a little time after work tonight to get something done.

Image

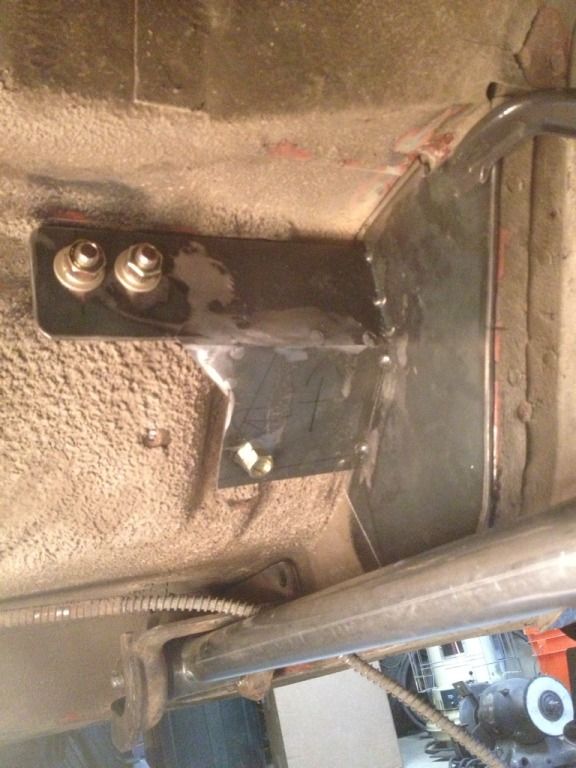
The lower bolt needs to be longer and have a washer and lock washer but it's the bolt for one of the seat belts so its going through a reinforced part of the body. There is a hardened steel spacer between the body and the bracket. This I used to locate the piece and add strength. I clamped the bracket to the sub-frame, drilled a pilot hole from inside through the hole for the seat belt bolt. Marked where I wanted the other holes and took the piece off. Drilled the holes and put the piece back on using the lengthened (but to short) seat belt bolt to get it back in the same spot. Drilled the two upper holes from under the car through the sheet metal using the holes on the bracket to locate them. Upper two bolts are 1/2 inch fine thread Grade 8 with thickened washers. That piece lands right where two pieces of sheet metal over lap and have a bit of a contour which should add strength. Inside is a 1/4 inch piece of steel for a plate. When it's all said and done I will also weld the front edge of the bracket to the sub-frame (right along where the clamp is.) Three pieces of metal that make up the sub-frame are bent right on that edge so it should be nice and strong. I was going to put two sleeves and two 1/2 inch bolt there but think welding that edge will be WAY stronger.

Image

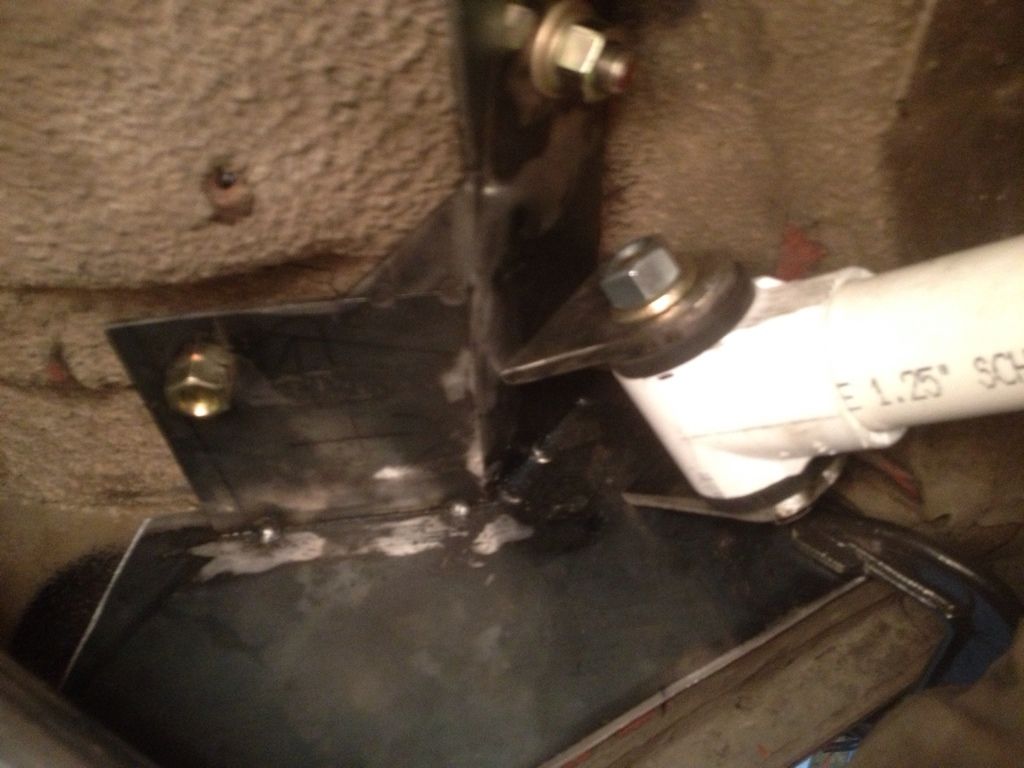
Here's a mock-up picture of what the upper arm will (should) look like. It gives me the correct angle I need to locate the rear end and stop side-to-side movement. It also allows me to keep the upper arm almost parallel to the lower arm, I'm still working on that and think I can make it work. I've read that keeping the length of the upper arm at 70% of the lower link is the optimal number but anywhere from 60-80 is fine. I'm at 65% right now so I feel good about that, especially since there is not much room back there.

Image
User avatar
drdvldog
Frequent Contributor
Posts: 248
Joined: Wed Aug 13, 2008 6:36 pm
Location: Northern VA
Contact:

Re: 1966 Lincoln Getting Bags

Post by drdvldog »

Looks bad ass man....keep it up.

Didn't you say you were scared to weld on stuff....looks like you don't mind jumping in with both feet!!!

I would like you to continue so I can steal some ideas....then you can come over here and help me bend some lines once your car rolls....if you can find the time to drive it across country!!
User avatar
darrylqmiller
Lincoln Maniac
Posts: 496
Joined: Tue Apr 05, 2011 12:58 am
Location: Peachtree City, Georgia
Contact:

Re: 1966 Lincoln Getting Bags

Post by darrylqmiller »

Family and work trump car time again.
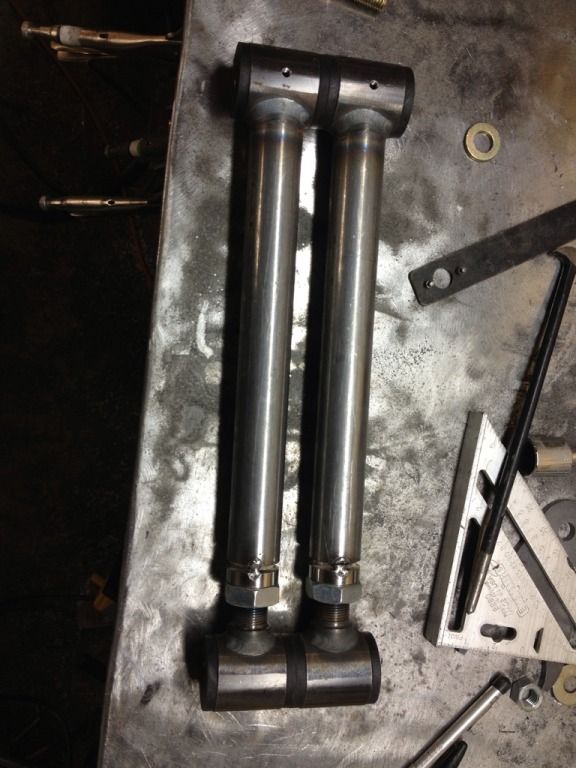
Lower bars are set and ready to go:

Image

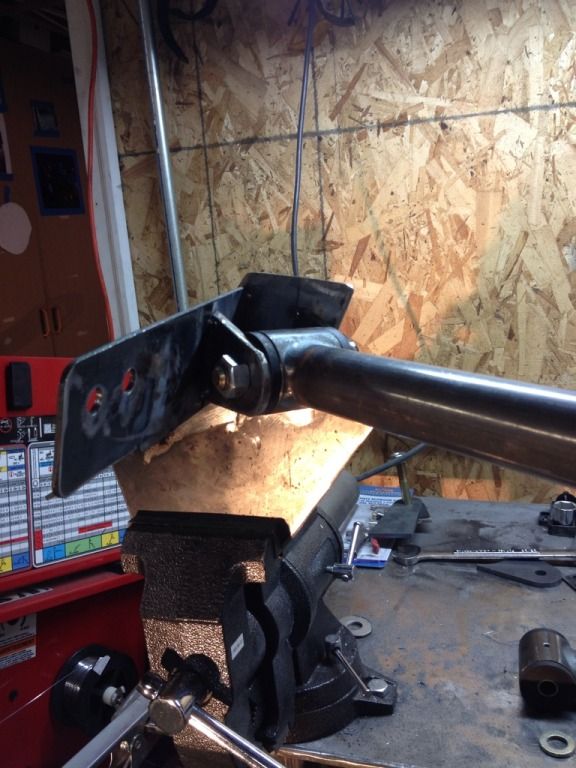
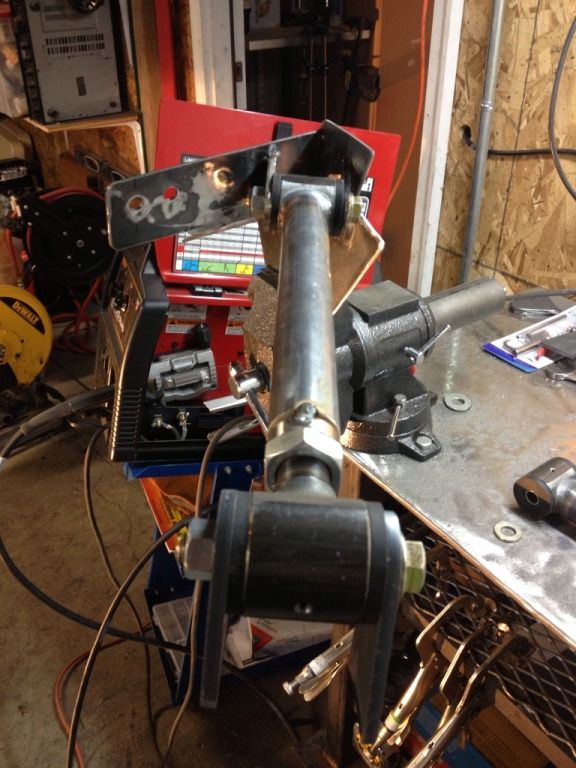
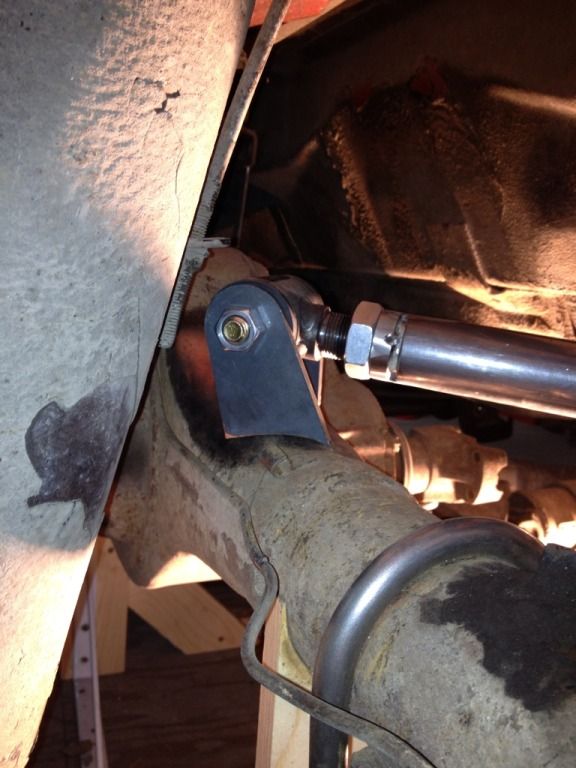
Got my brackets for upper bar on driver side tacked after getting my bars cut and tacked:

Image

Image

Image

Image

Got the passenger side ready also. Wife is out of town and my son has a sleep over. Tried to get my daughter to find a friend to spend the night with but couldn't find anyone so I had to wrap it up to spend time with her. I'll have the axle end of the upper bars welded on tomorrow though and cycle my rear end up and down and see how I did.

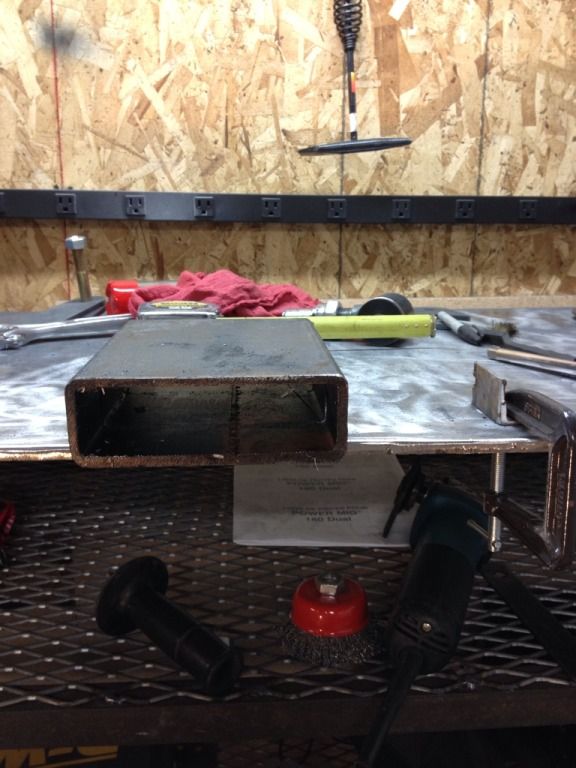
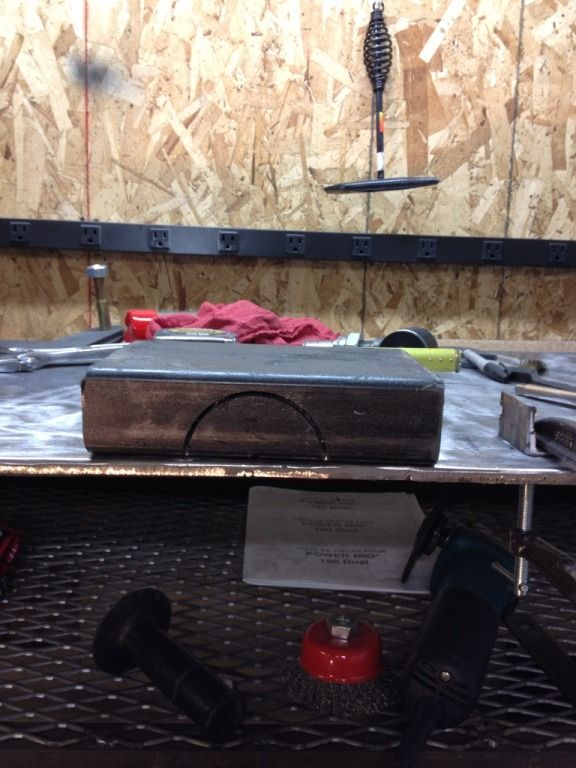
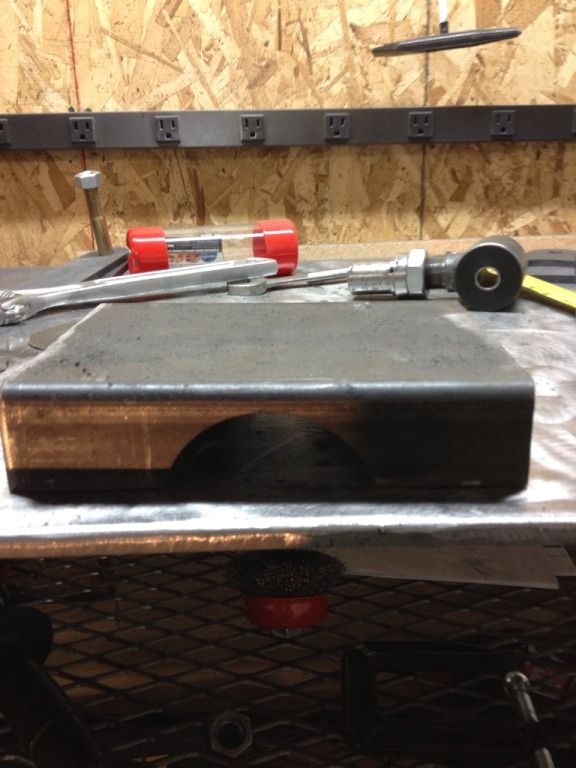
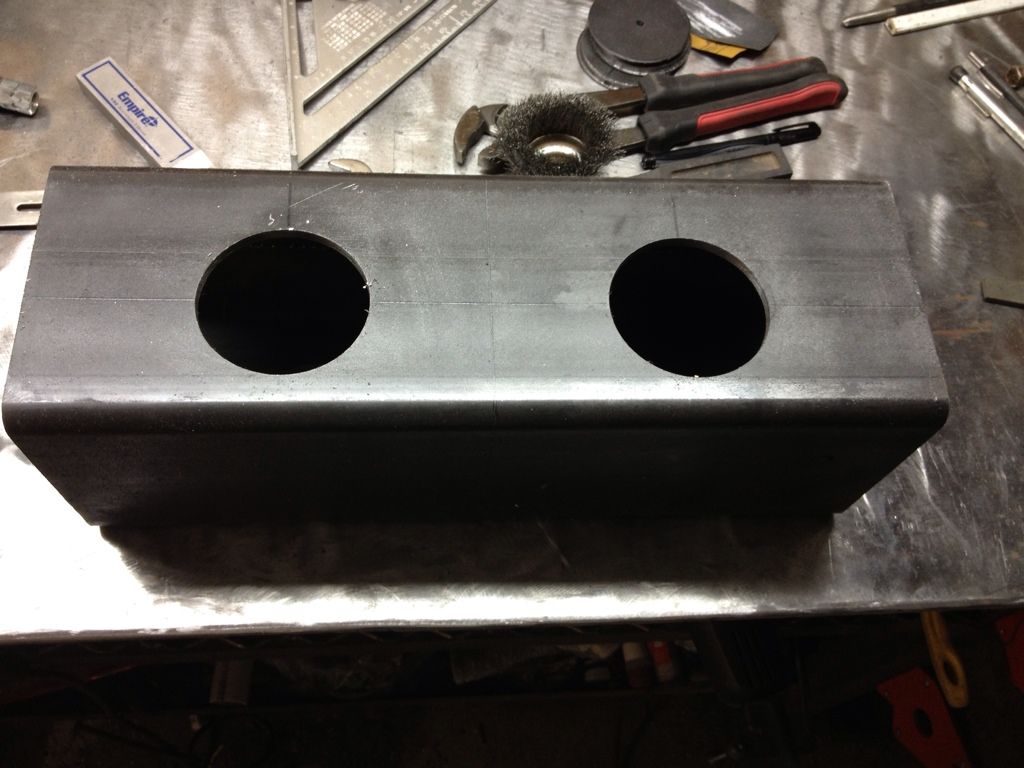
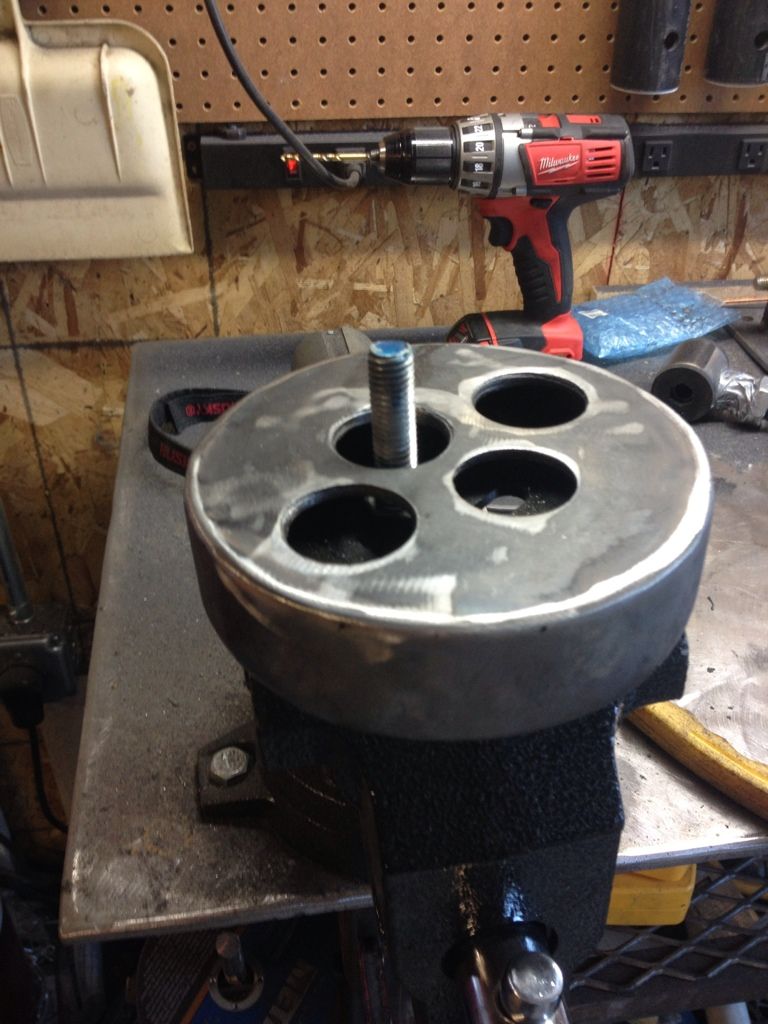
During the week at the shop used the drill press to work on my bag mounts. Started with some 2 X 6 X 3/16 tube steel I got for free from the steel place, clamped them together and drilled a 3 1/4 inch hole through each side of them. Came out great!
Image

Image

Image

Only problem was I didn't think of the height of the U-bolts or the, I'm guessing, what looks like the breather tube on the passenger side. So I went back to the steel place and ended up with a 6X 6 X 3/16 piece and drilled four holes, this time keeping in account the U-bolts and stuff. This is what I have so far. I'll post pictures after I finish cutting it tomorrow.

Image
User avatar
darrylqmiller
Lincoln Maniac
Posts: 496
Joined: Tue Apr 05, 2011 12:58 am
Location: Peachtree City, Georgia
Contact:

Re: 1966 Lincoln Getting Bags

Post by darrylqmiller »

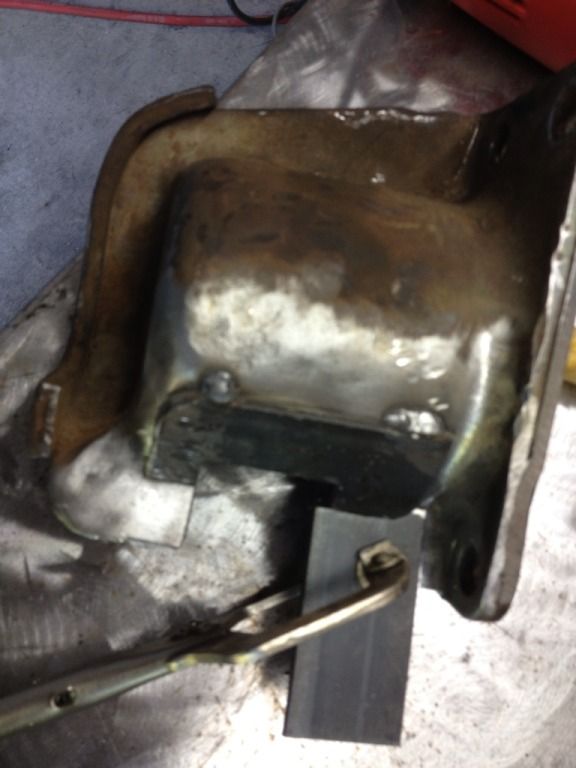
Well, didn't get to cut the bag bracket today but got the upper links finalized and tacked to the axle. Took out the lower bars for the what seems like 100th time and modified the original leaf spring bracket so the lower bars could go up all the way. Took some 1/8 bar and welded pieces together to give it a 1/4 inch edge for strength where I had to make the cuts. Unfortunately I only got one picture as I started.

Image

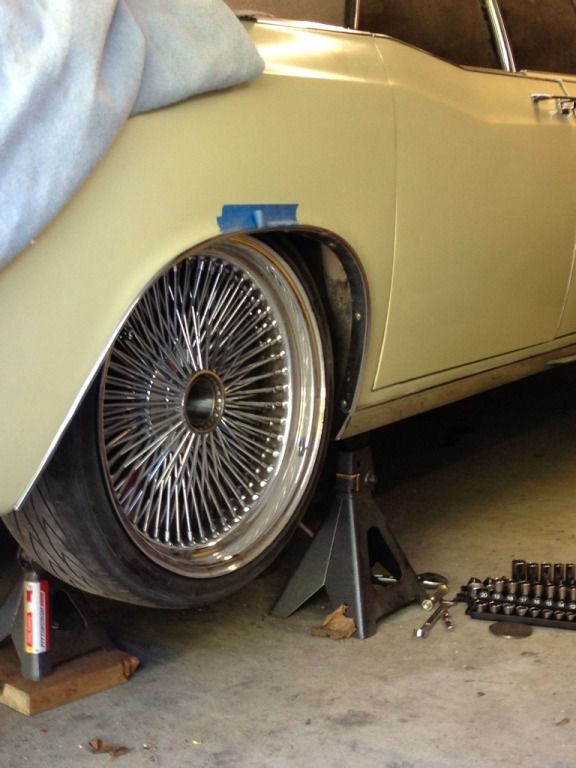
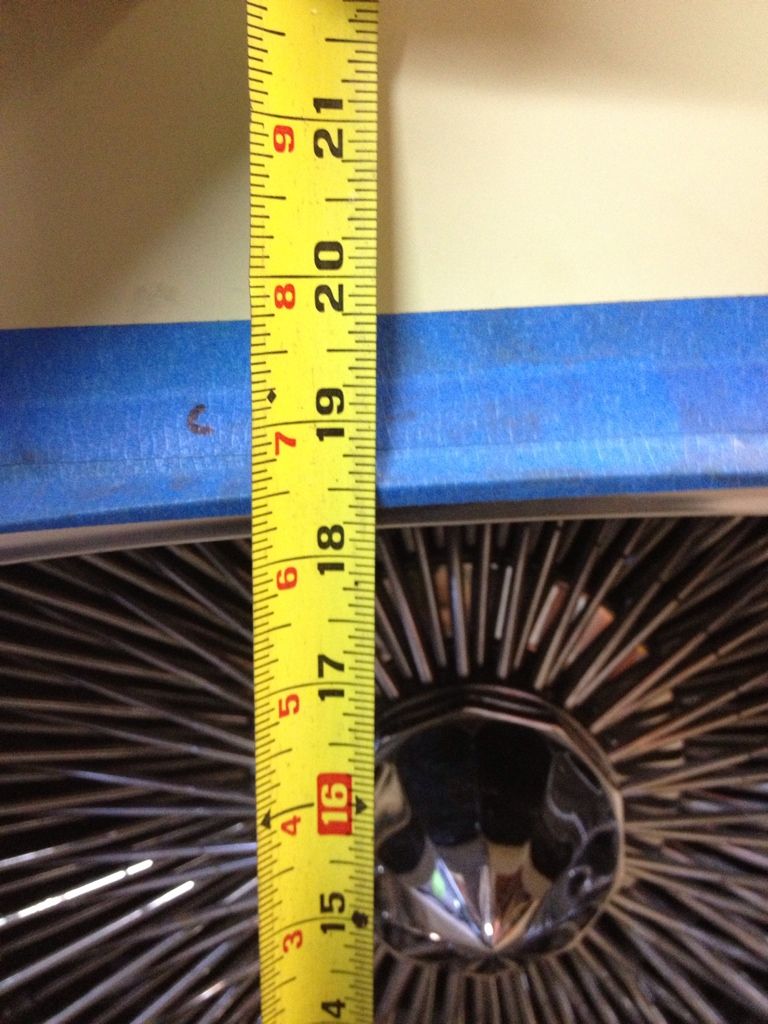
Good news is I got everything in place and was able to take the rear end and put it on jack stands and get that contraption I had holding the rear end in place out of there. This allowed me to cycle the rear end up and down through the motions replicating the bags filling and deflating. I was a bit nervous but all of the nights studying, reading and then cutting, tacking welds, measuring, cutting out welds, remeasuring and re-tacking paid off. The rear end went up and down with no binding and the pinion angle changed just 2 degrees through the motion. My lower bars are parallel to the ground at ride height, the upper bars are about 68 percent of the length of the lower bar (I read 70 percent is optimal with 60-80 percent range realistic), my pinion angle is correct at ride height and the angle hardly changes at it lowest point. Couldn't really get a good picture but the bottom of the tire is right about 2 1/2 inches from the rocker and I still have the bump stops installed so when they're out i should be able to lay pretty low at shows and then put in bump stops for daily driving so if something fails I'm not dragging and losing half my car down the road.

Ride height:

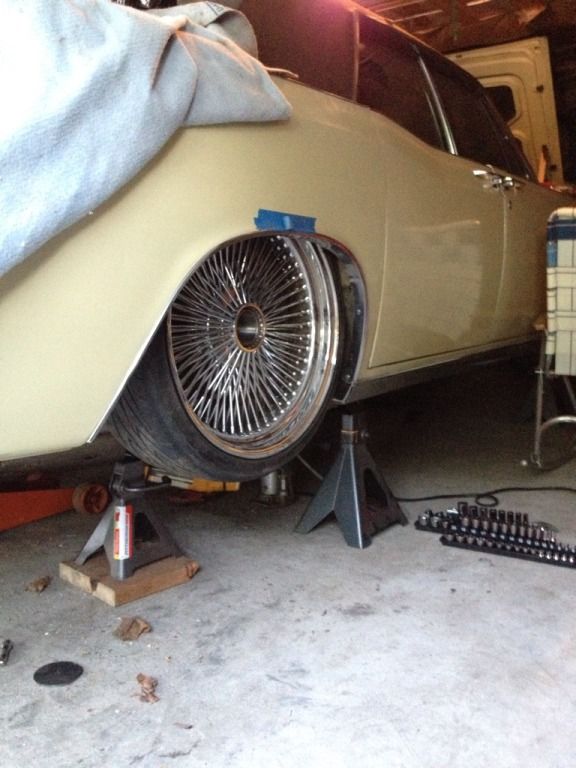
Image

Lowered but the picture for some reason makes the tire look not as tucked as it is. Put a level under the rocker panel and the bottom of the tire is about 3 inches from the bottom of the rocker

Image
User avatar
darrylqmiller
Lincoln Maniac
Posts: 496
Joined: Tue Apr 05, 2011 12:58 am
Location: Peachtree City, Georgia
Contact:

Re: 1966 Lincoln Getting Bags

Post by darrylqmiller »

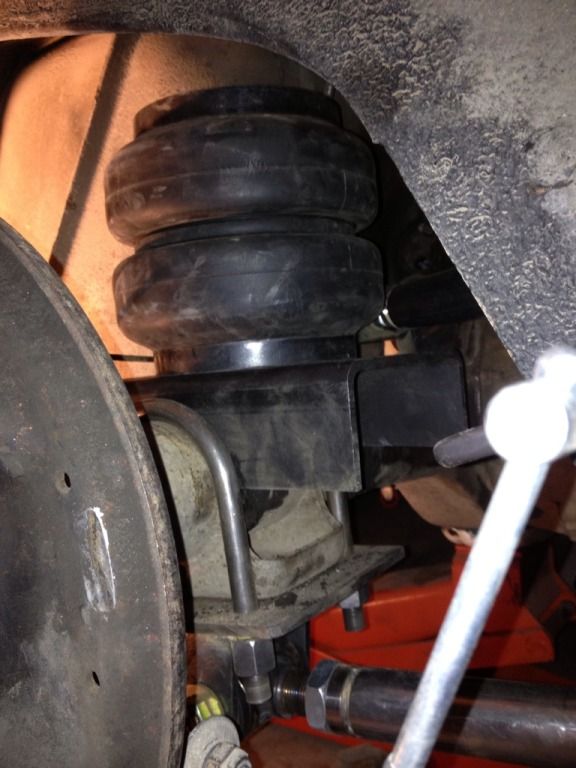
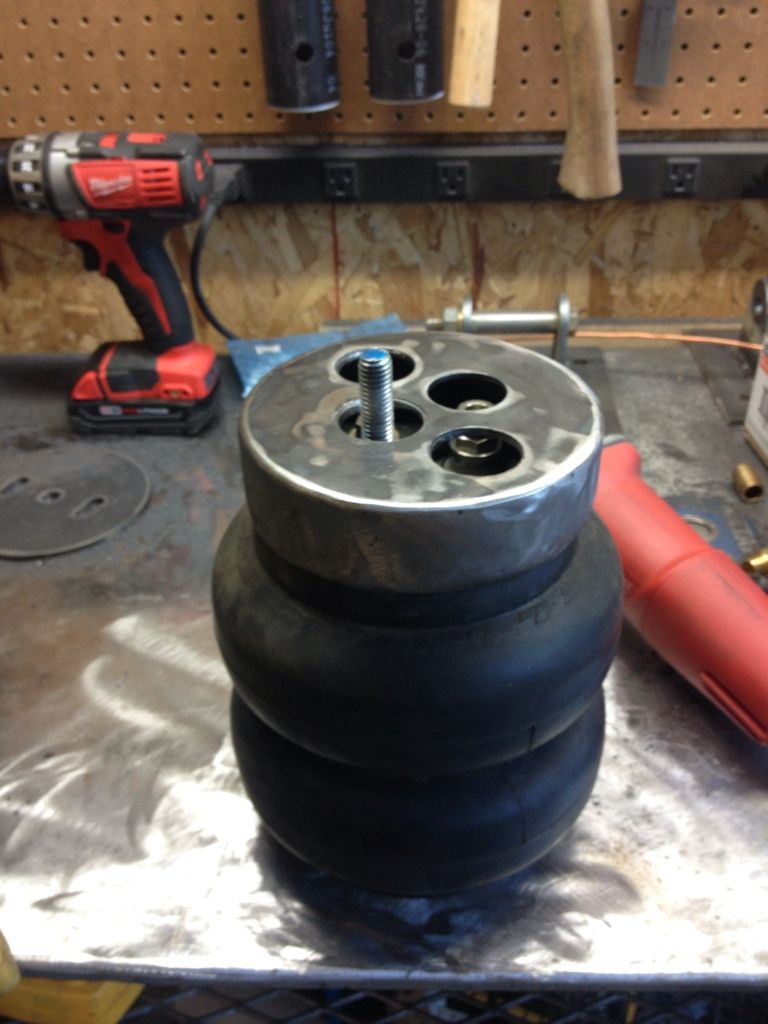
Well, another week lost to work, life and Mothers Day but I'm back. Tried out one of the bags and the rough start of one of my over the axle bag mounts.

Image

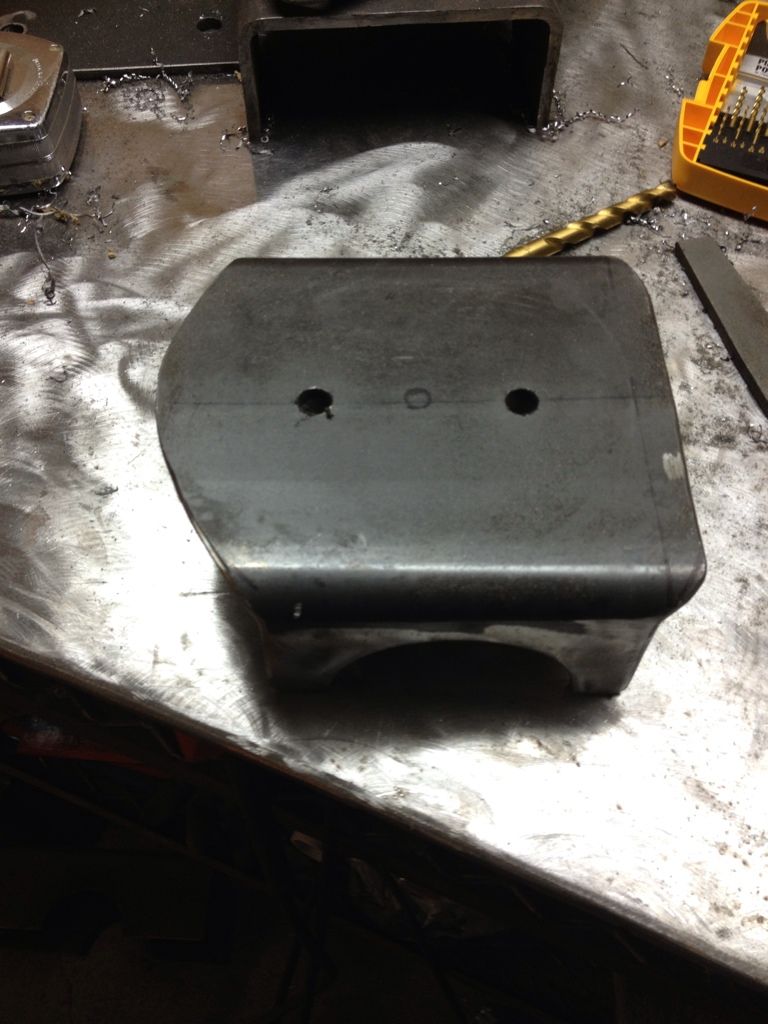
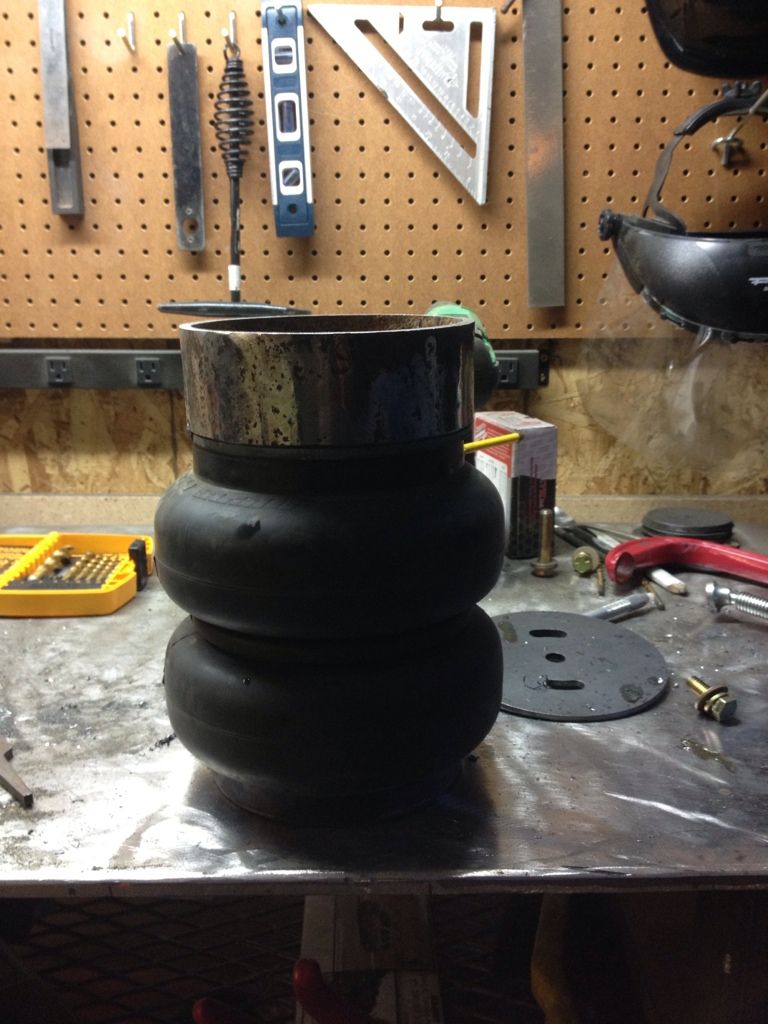
Bag mount cut and roughed in, still needs a bit of grinding but you can get the gist of it.

Image

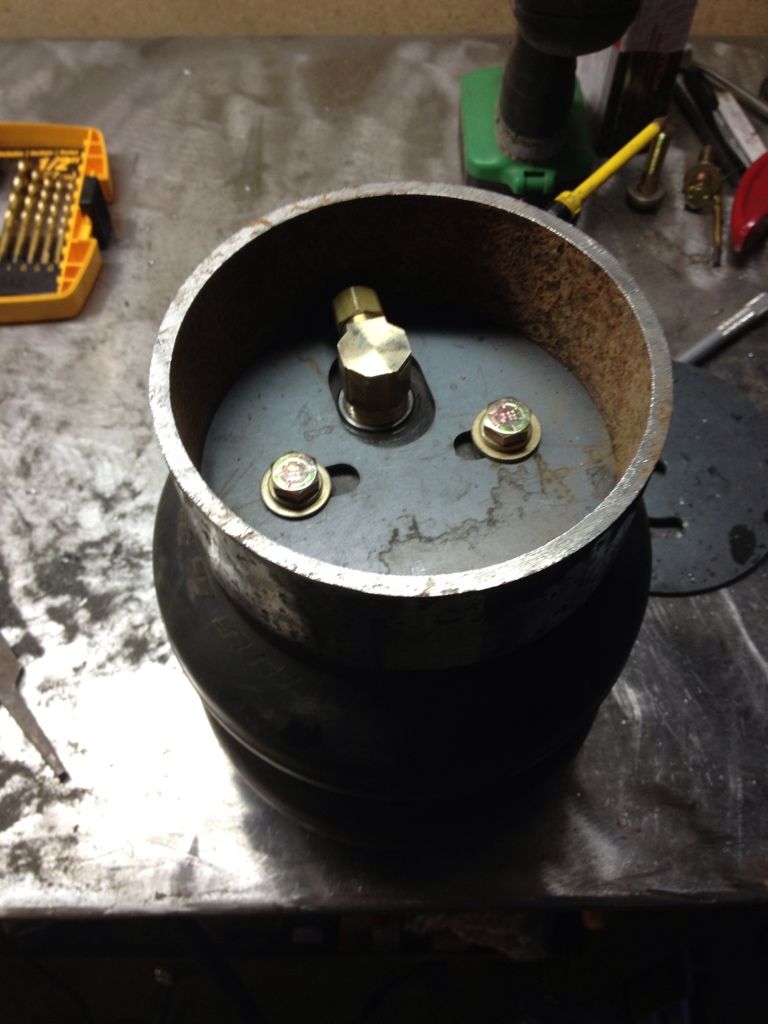
Made myself a 2 inch cup that will go flush to the under side of the car and sandwich the body with another piece of metal on the top. I'll probably weld on a square piece of steel that is a bit bigger than the circle plate down below. The 90 degree fitting will be replaced with a straight PTC fitting and the line will come straight up into the trunk.

Image

Image

I did also straightened up a bit and hung some spare peg board I had and used extra hooks to get more organized. Also bought myself a birthday present, a new Makita grinder so I wouldn't have to keep switching between cutting disk and flapper wheels. We're so spoiled in America, now I just need a bench top drill press and I'm set for awhile.

Image

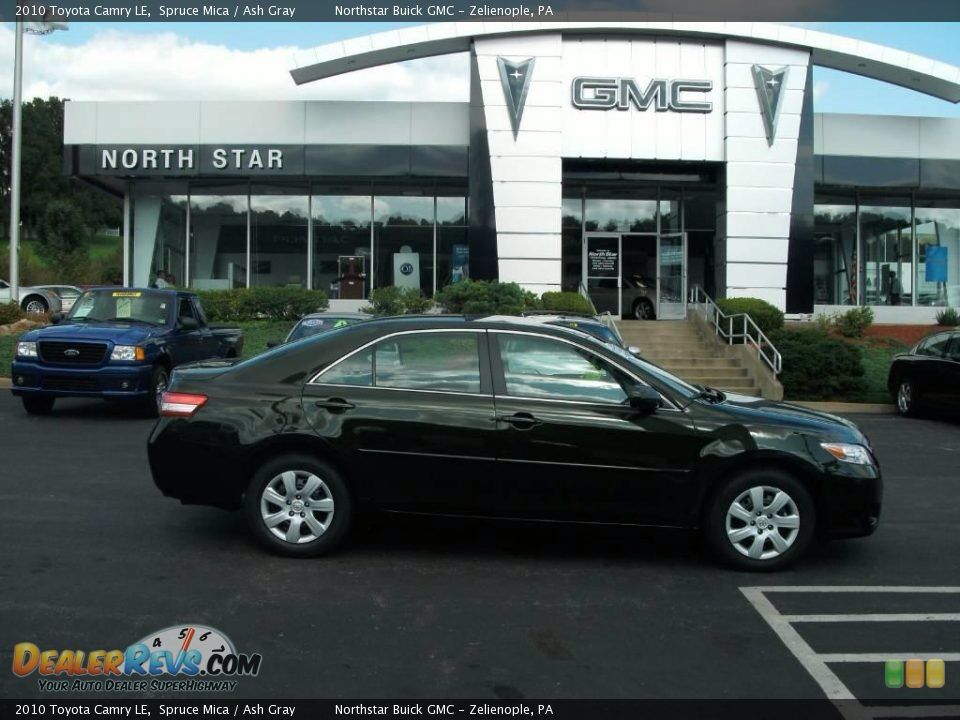
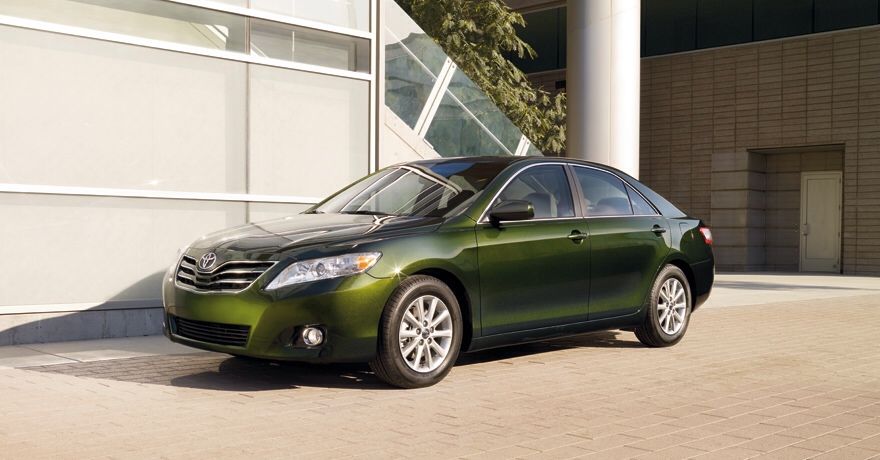
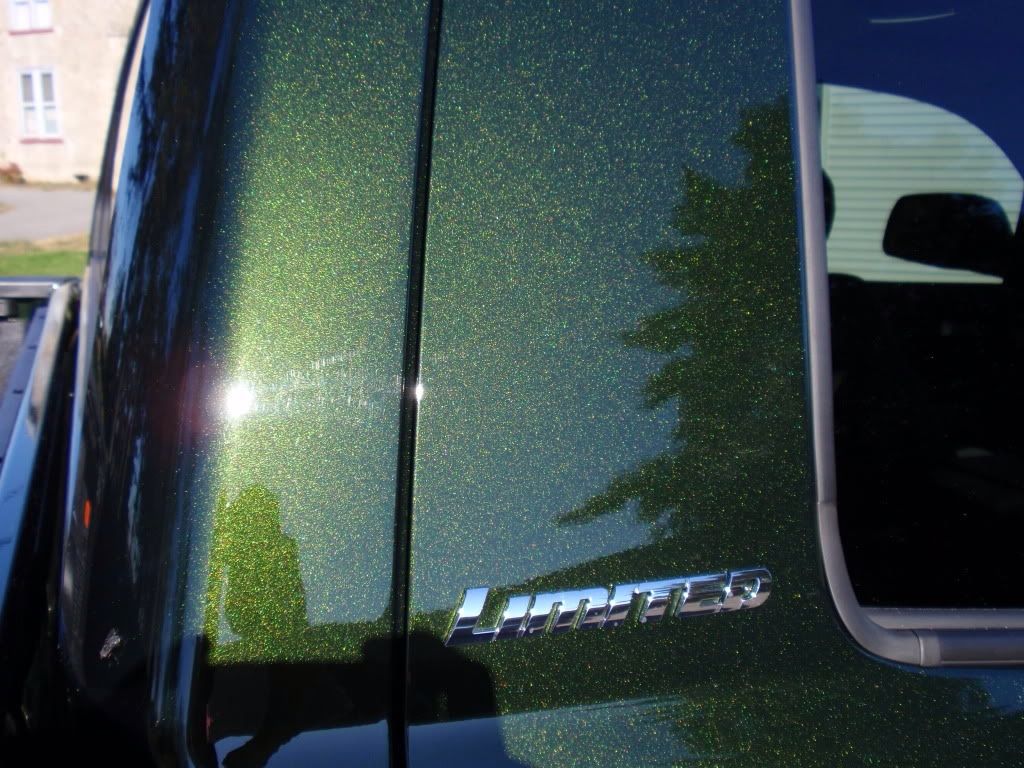
Think I might have found the color for paint also. It's a Toyota color, Spruce Mica. My son and I saw it on a Toyota Tundra the other day so I know it looks good on a bigger car. Went home and looked it up.
It looks dark:

Image

But in the right light it really pops and should go good with my original green leather interior:

Image

Image
crispix396
Lincoln Maniac
Posts: 297
Joined: Tue Oct 25, 2011 2:41 am
Contact:

Re: 1966 Lincoln Getting Bags

Post by crispix396 »

beautiful color. wish they had that in blue.
Because I forget to post it...
1962 Lincoln continental convertible
1995 Caprice wagon
User avatar
darrylqmiller
Lincoln Maniac
Posts: 496
Joined: Tue Apr 05, 2011 12:58 am
Location: Peachtree City, Georgia
Contact:

Re: 1966 Lincoln Getting Bags

Post by darrylqmiller »

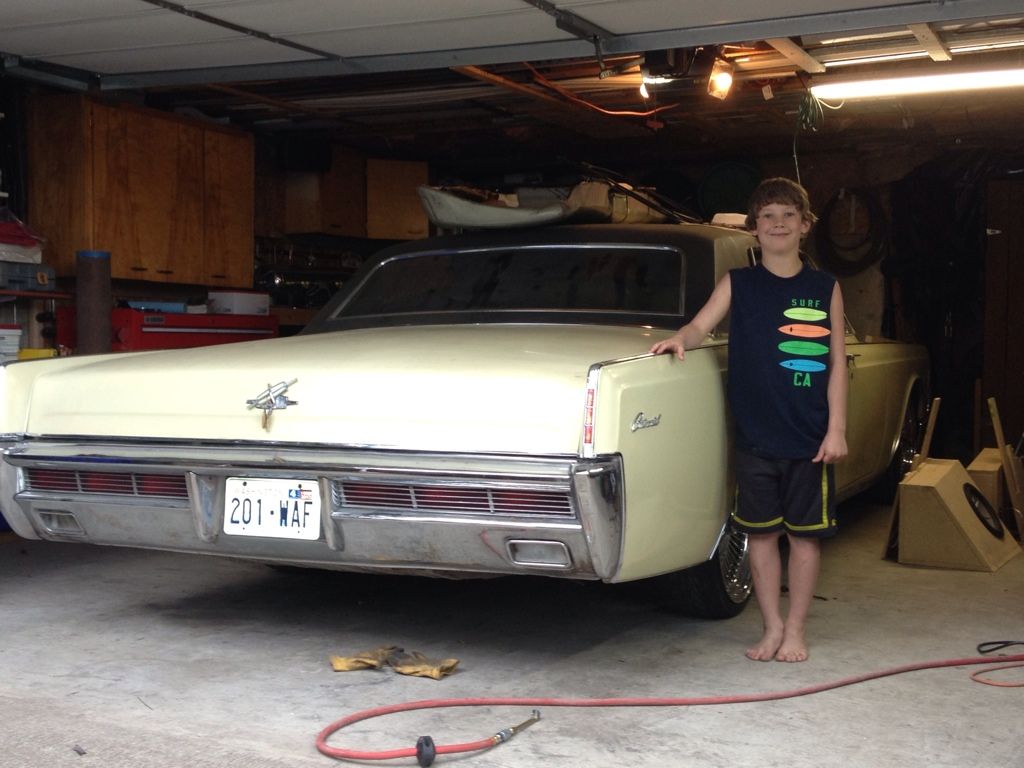
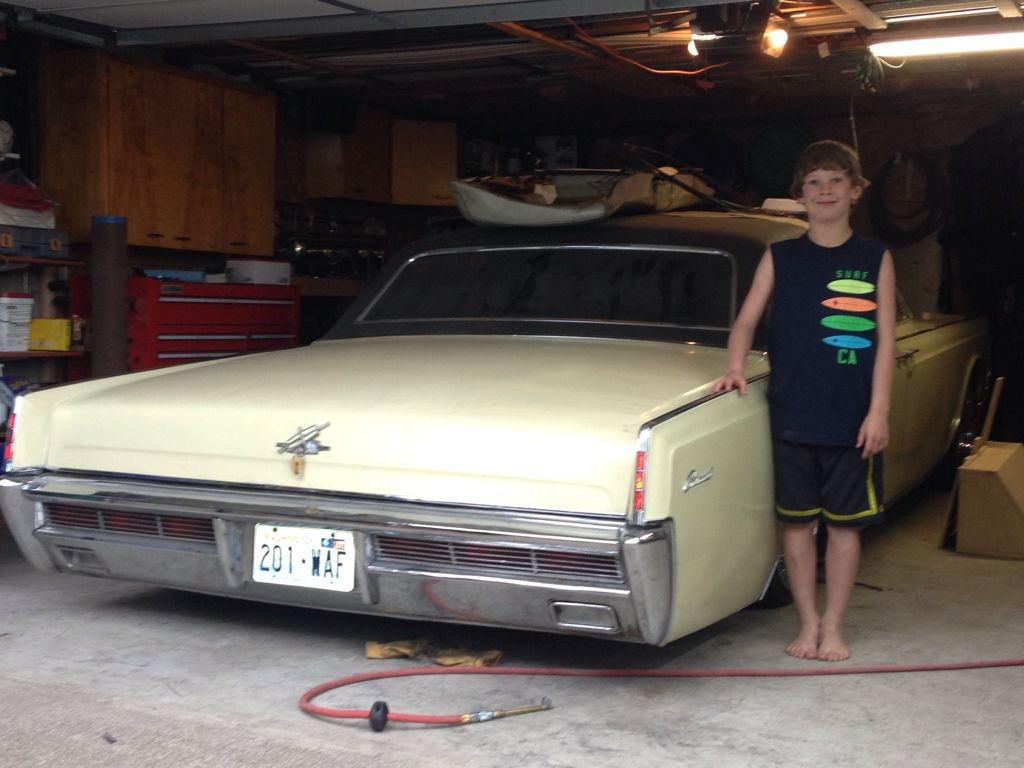
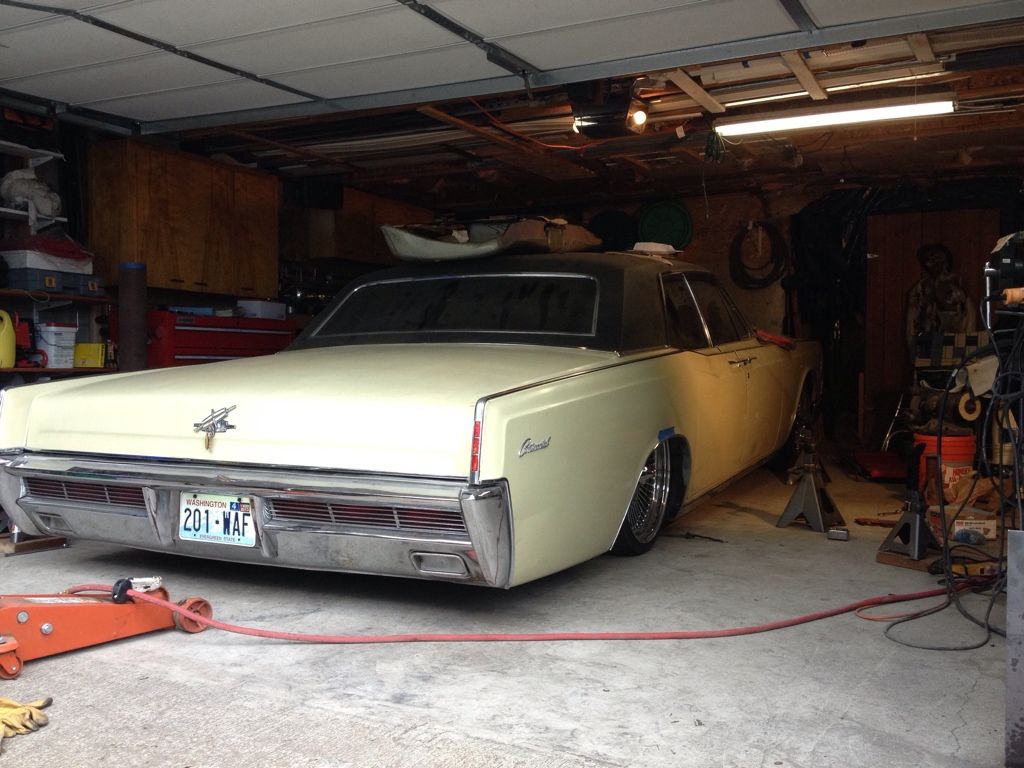
Well I'm finally making progress. I just read whitecastle's post and must say that some days I wish I had just ordered a kit. The weathers getting nice and I still have much to do, with a Mobsteel kit I'd be cruising by now. I remind myself I have also done extra stuff though like replaced my very rusty gas line today. Anyways, finally got her off of the jack stands for a test run today and I was like a kid at Christmas with a big grin on my face. All of the reading, studying and work paid of quite well.

My favorite helper for height comparisons:

Image

Image

Image

Image

Right now the axle is sitting on the frame so I can't go any lower without major work so I'm calling it good. Running 20 inch tires and it's pretty low. I can always get smaller tires if I want to go that last 1 1/2 to lay actual rocker but then I'll have a whole other set of problems like exhaust. I think I'm going to take a break and do some fun stuff, plumb my tank and back two valves, get EDC wired, switch box wired, etc. Things that need to be done but yet gives me a break from the fabricating. Then on to the front which I anticipate will be much easier.
User avatar
Jay O
Occasional Visitor
Posts: 44
Joined: Tue Sep 14, 2010 11:46 pm
Contact:

Re: 1966 Lincoln Getting Bags

Post by Jay O »

Nice Work! It looks so good on the ground.. :grin:
61 Lincoln Continental_SOLD
64 Lincoln Continental_Yippee!
User avatar
darrylqmiller
Lincoln Maniac
Posts: 496
Joined: Tue Apr 05, 2011 12:58 am
Location: Peachtree City, Georgia
Contact:

Re: 1966 Lincoln Getting Bags

Post by darrylqmiller »

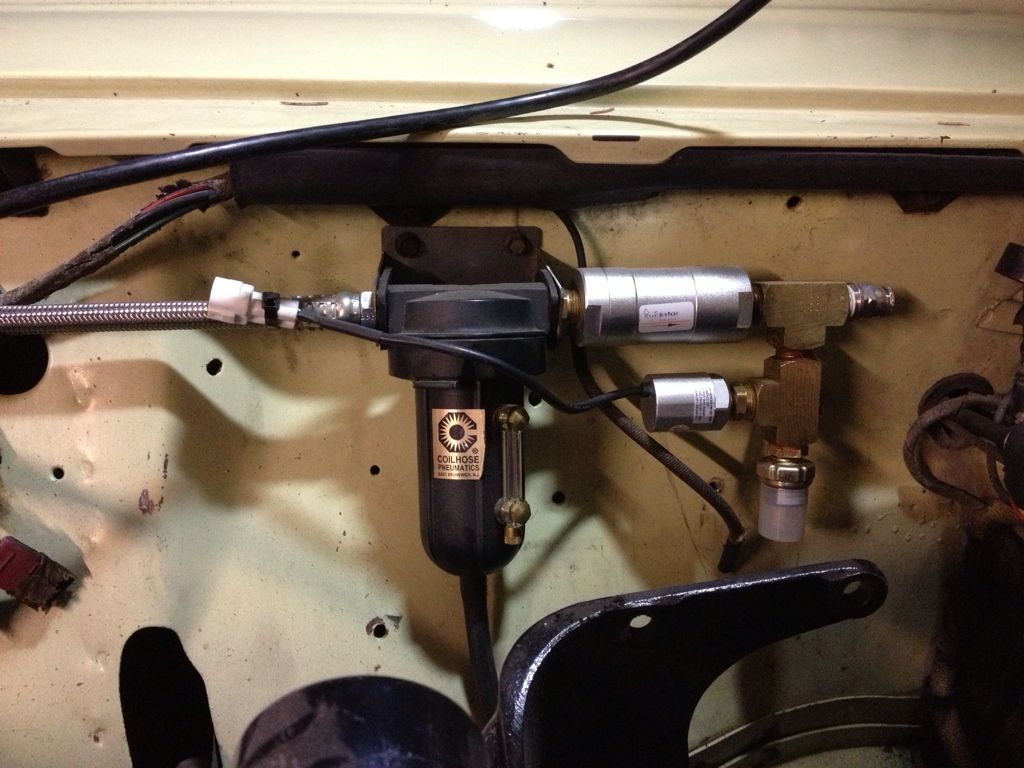
Bit of progress. Got my line ran from my EDC to the outside of the trunk. Took my time to run it cleanly and as discretely as possible. Here's a picture of the filter and such.

Image

I have a Kilby intake filter just cause that black canister looks a little more like an OEM piece than a blue/red KN filter under the hood. I ran a 3 foot S/S braided line from the EDC to the coalescing filter due to the heat I hear these things put out. Then my check valve, pressure switch and the pressure sensor for my digital valves. When it's all done and I know it's working right I hope to paint it the same color as the engine bay so it kind of blends in.

Got the rear end out and started welding it up.

Image

Image


Now to weld the bag cups, link bars and my uni-frame brackets and I can put her back in. I hope to get this done this week end along with bending the new brake line and getting the brakes hooked back up. Missing the first car show this Sat but hoping not to miss another this summer so I need to get some work done.

Good news is my kids are out of school next week and my wife is leaving for Guatemala to teach leadership skills to the Bishop and some select nuns tomorrow morning. She'll be gone for 2 1/2 weeks and my kids will be at a friends for a whole week so when I get home from work I have nothing to do but get this car done.

Bad news is my AVS 9 box isn't working and after two emails to The Gauge Store I haven't heard back as to what they are going to do for me. I like the lock feature on the nine switch box which would keep an accidental bag deflate going down the road. With my gas tank only 3/4 of an inch off the ground I really don't want to think of what could happen if the rear went down while driving down the highway.

Might have to buy a new one from Air Assist and get the remote so I can raise the car up and down remotely.
User avatar
darrylqmiller
Lincoln Maniac
Posts: 496
Joined: Tue Apr 05, 2011 12:58 am
Location: Peachtree City, Georgia
Contact:

Re: 1966 Lincoln Getting Bags

Post by darrylqmiller »

Little update. Hard to get stuff done with work and my wife being out of town. Have to play Mom and Dad all the time, makes garage time hard to find.

Got my upper "cups" made for the rear. This will sit flat against the bottom of the car and the sheet metal will sandwich between the "cup" and another plate in the trunk.

Image

Wanted to give it more of a flat surface to ride on and not just the pipe side walls. Mounts like this:

Image

Instead of this:

Image

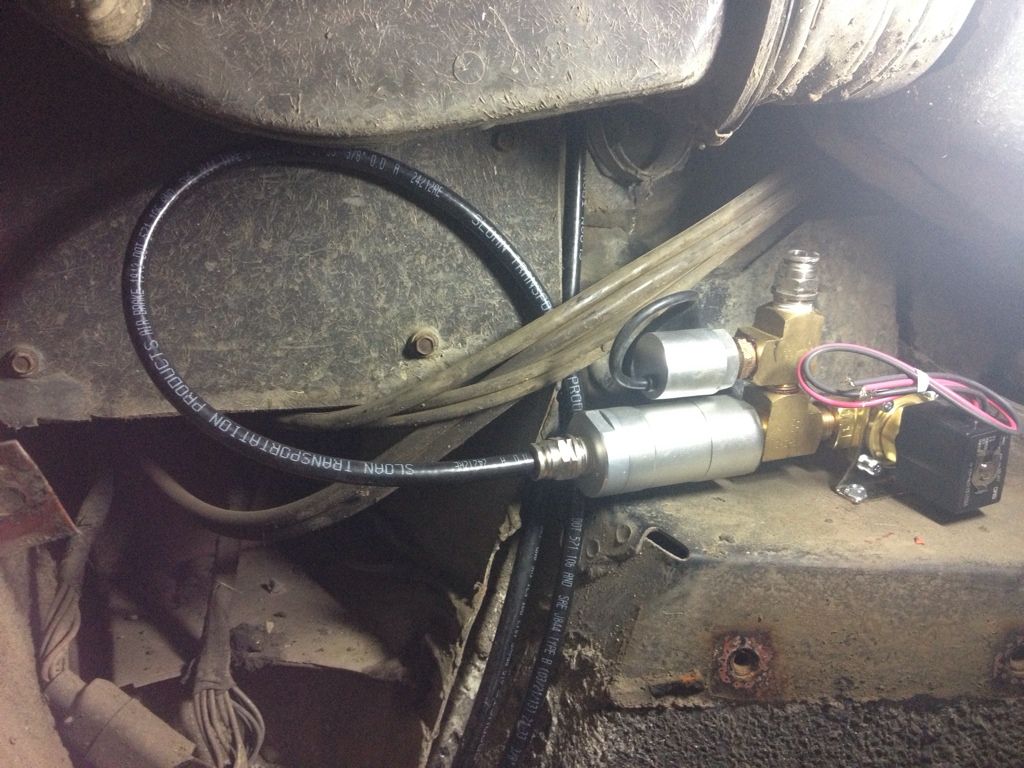
Also figured out the best way to mount the valves. Wanted to put the check valves as close to the bag as I could so if a line breaks between the tank and the bag under the car it will still hold pressure. This mounts behind the inner fender so it will be protected from road debris kicked up from the tire. Plus lines will be protected. Considering braided lines from the dump valve to the bag.

Image

That's it for now but the the kids know all I want for Fathers Day is a day to work on the car. Plus Monday AM a family friend is picking the kids up and taking them for the week so I'm a bachelor for the week. Now as long as I don't get stuck working out of town all week I should get a bunch done.
Post Reply

Return to “Customized Member Projects”

Who is online

Users browsing this forum: No registered users and 1 guest